First month for free!
Get started
Published 11/30/2025
Creating an SRT file is a lot simpler than you might think. At its core, it’s just a plain text file, but with a specific set of rules that sync dialogue to your video’s timeline. Think of it as a universal script that tells any video player exactly when to show each line of text. This simplicity is why it's the most widely supported caption format out there.
Before you jump into making one, let's break down what you're actually building. The name SRT comes from SubRip Text, which gives you a clue about its history. The format was designed to be as basic as possible, using only plain text that any computer can understand and any simple editor, like Notepad on Windows or TextEdit on a Mac, can handle.
This bare-bones approach is its biggest advantage. Unlike other, more complex caption formats, SRT files don't mess around with styling like fonts or colors. They have three jobs and three jobs only: what to say, when to show it, and when to hide it. This laser focus is what guarantees it’ll work almost anywhere—from YouTube and Vimeo to nearly all social media platforms and video editing software.
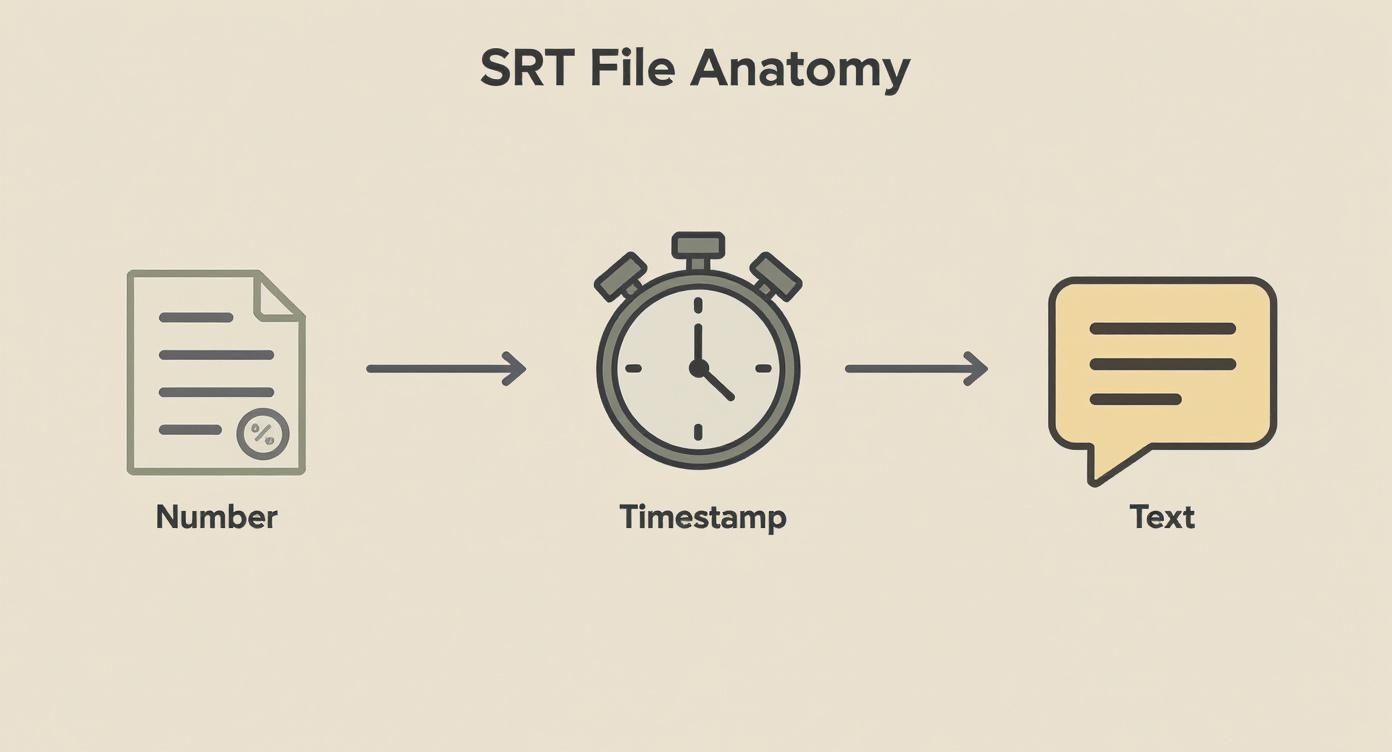
Every single subtitle in an SRT file is its own little block of information, built from four distinct parts. Get these right, and you've mastered the basics of creating a valid file that won't give you headaches later.
Here’s a closer look at what goes into each subtitle entry.
Anatomy of a Single SRT Subtitle
| Component | Example | Purpose |
|---|---|---|
| Sequence Number | 1 |
A simple counter (1, 2, 3...) that keeps the subtitles in order. |
| Timestamp | 00:00:01,250 --> 00:00:04,100 |
The most critical part. It tells the player the exact start and end times in an hours:minutes:seconds,milliseconds format. |
| Subtitle Text | Hello, and welcome to our guide! |
The actual text that will appear on the screen. It's best to stick to one or two lines to keep it readable. |
| Blank Line | (an empty line) | This acts as a separator, telling the player that one subtitle block has ended and the next one is coming up. |
As you can see, it’s a straightforward system. The blank line at the end is non-negotiable—it's the signal that one caption is done and the player should get ready for the next.
The SRT format popped up in Europe around the year 2000, and it completely changed the game for subtitling. Before SRT, creating captions was a pricey, technical process that only big media companies could really afford. It required specialized gear and software.
The SRT file made it possible for anyone to rip subtitles from a DVD and tweak them with free software. This shift opened the door for creators of all sizes to make their videos more accessible to a wider audience. If you're curious about the deep dive into this history, you can find a lot more on how the format revolutionized captioning on Meowtxt.com.
The Big Picture: An SRT file is just a script tied to a clock. Each entry gives the video player a simple command: "Show this text from this exact millisecond to that exact millisecond." Nail this simple, four-part structure, and you're well on your way to creating professional, perfectly synced captions.
Alright, enough with the theory. Let's roll up our sleeves and build an SRT file from scratch using nothing more than a simple text editor. I'm a firm believer that doing this manually at least once is the best way to really get how subtitles work. It gives you a rock-solid foundation that no automated tool can replicate.
All you need is a basic program like Notepad on Windows or TextEdit on Mac. The process is straightforward but requires attention to detail: you'll watch your video, listen closely to the dialogue, and carefully log the start and end times for every single line.
First things first, let's get your tools ready. You need to make sure your text editor is in "plain text" mode.
If you're on a Mac, open TextEdit, head up to the Format menu, and select Make Plain Text. This is a crucial step because it gets rid of any sneaky background formatting that can break your SRT file. For Windows users, you can skip this part—Notepad is already a plain text editor by default.
Now, pull up your video in a separate window. You'll be doing a lot of pausing, rewinding, and re-playing, so it helps to have both your video player and your text file side-by-side. The real work begins now, translating what you hear into the strict SRT format.
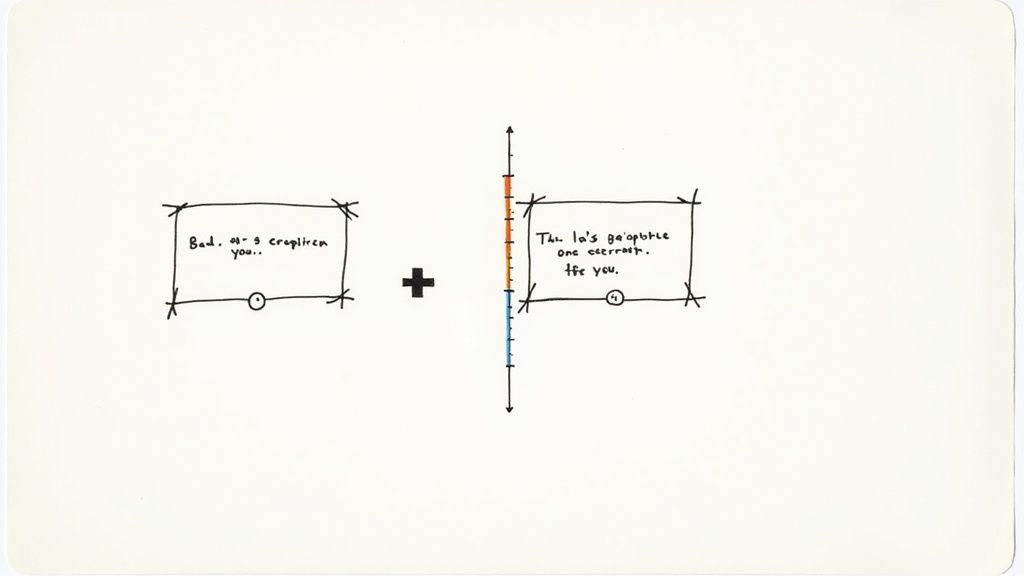
This diagram shows the simple, repeatable pattern you'll be using for every subtitle.
As you can see, it's just a sequence number, a timestamp, and the text itself. That's the core of every SRT file.
Let’s put it all together and build your very first subtitle block. This is where careful listening meets precise formatting.
Start your counter. Type the number 1 on the first line and hit Enter. Simple enough—this kicks off your first caption.
Log the timestamp. Play the video and hit pause the instant you hear the first piece of dialogue. Jot down that time. Let the dialogue finish, pause again, and note the end time. You'll write this down in the very specific HH:MM:SS,mmm --> HH:MM:SS,mmm format. For example, if a line starts at exactly 12 seconds and 340 milliseconds, your timestamp would begin 00:00:12,340.
Transcribe the text. On the very next line, type out the dialogue you heard. A good rule of thumb is to keep each line under 42 characters and stick to a maximum of two lines per subtitle block. This keeps things clean and easy for the viewer to read.
Each subtitle block you create follows this pattern: the number, the timestamp, the text, and a blank line to separate it from the next one. The timestamp is what makes the magic happen, allowing for perfect sync with your video. You can dig deeper into the nitty-gritty of the format over at sally.io.
A Quick Tip: Don't obsess over getting the timing perfect on your first pass. Focus on getting all the dialogue transcribed with rough timestamps. You can always go back later and nudge the milliseconds for that perfect, professional sync.
After typing your subtitle text, hit Enter twice. This creates that all-important blank line that signals the end of the subtitle block. Now, you’re ready to type 2 and do it all over again for the next line of dialogue. Keep this rhythm going until you've captioned your entire video.
While crafting an SRT file by hand is a fantastic way to learn the ropes, let's be honest—it’s not exactly practical for longer projects. When you need to get things done quickly and with precision, dedicated subtitle software is an absolute game-changer. These tools take you out of the abstract world of text files and timestamps and drop you into a visual, interactive environment that makes syncing dialogue feel intuitive.

It’s like graduating from a paper map to a live GPS. Instead of just plotting coordinates and hoping for the best, you see the entire journey laid out in front of you. This is precisely what tools like Subtitle Edit and Aegisub bring to the table.
The single most powerful feature in any decent subtitle software is the visual timeline, which is almost always represented by an audio waveform. This graph of your video’s sound lets you see exactly where dialogue begins and ends. No more guessing timestamps or replaying a clip a dozen times. You can literally just click and drag to set the start and end points for a subtitle right on the waveform.
This approach is not only faster but incredibly more accurate. It helps you nail those subtle pauses and match the natural rhythm of speech—a tiny detail that makes the difference between good subtitles and truly great ones.
Another huge win is the real-time feedback. As you type out your subtitles in the editor, you can instantly see how they’ll look on the video. This immediate preview loop saves you the hassle of constantly saving your SRT file and loading it into a separate media player just to check your work.
Key Takeaway: The biggest leap forward with subtitling software is the ability to work visually. Seeing the audio waveform lets you align text with pinpoint accuracy, turning a tedious manual process into a fluid, creative one.
Beyond the visual timeline, these powerful (and often free) tools are packed with features designed to solve common subtitling headaches. Think of them as a built-in quality control assistant, flagging potential issues before your audience ever sees them.
When you're picking a tool, make sure it has these functions:
These features drastically cut down on editing time and help you produce a professional, error-free final product. Once your subtitling projects become more frequent or complex, making the jump from a simple text editor to dedicated software isn't just a good idea—it's the only logical next step.
Doing things by hand gives you total control, but let's be realistic. Manually captioning a two-hour podcast or a keynote presentation is a massive time sink. We're talking about an entire day's work, easily.
This is where AI-powered speech-to-text services come in and completely change the game. What used to take hours of painstaking work—listening, typing, and timestamping—can now be done in just a few minutes.
These platforms don't just transcribe; they listen to the audio, figure out who is speaking when, and generate a perfectly formatted SRT file. The AI handles all the tedious parts, analyzing the audio to pinpoint when each line of dialogue starts and stops. This makes it feasible to add subtitles to your entire back catalog of videos without needing a dedicated team or weeks of effort to create an SRT file.
The magic behind this automation is a Speech-to-Text API. Services like Lemonfox.ai provide a way for your applications to send an audio or video file to a powerful AI model and get back a structured, timestamped transcript.
The process is surprisingly straightforward. You could even write a simple script that watches a folder for new videos, automatically sends them to the API for transcription, and saves the resulting SRT file. This kind of programmatic workflow is a lifesaver for businesses that create content at scale.
And the quality is no longer a concern. With clear audio, modern transcription models often hit over 95% accuracy.
Here’s a conceptual Python example to give you an idea of how you could use the Lemonfox.ai API to automate SRT creation.
import lemonfox_api
client = lemonfox_api.Client(api_key="YOUR_API_KEY")
file_path = "path/to/your/video.mp4"
transcription = client.transcribe(
file=file_path,
language="en",
get_word_timestamps=True
)
srt_content = ""
for index, segment in enumerate(transcription.segments):
start_time = format_timestamp(segment.start)
end_time = format_timestamp(segment.end)
text = segment.text
srt_content += f"{index + 1}\n"
srt_content += f"{start_time} --> {end_time}\n"
srt_content += f"{text}\n\n"
with open("output.srt", "w") as file:
file.write(srt_content)
print("SRT file created successfully!")
As you can see, a handful of code can completely replace the manual process of typing and timing subtitles.
To help you decide which approach is right for you, here’s a quick breakdown of the pros and cons of creating subtitles by hand versus using an automated service.
| Feature | Manual Creation | AI-Powered Creation |
|---|---|---|
| Speed | Very slow; hours for long videos. | Extremely fast; minutes, regardless of video length. |
| Accuracy | Potentially 100%, but prone to human error. | High (95%+), but can struggle with jargon or poor audio. |
| Cost | "Free" in terms of money, but very high time cost. | Low per-minute cost, significant time savings. |
| Scalability | Poor. Not feasible for large volumes of content. | Excellent. Can process thousands of hours of video easily. |
| Effort | High. Requires intense focus and tedious work. | Low. Mostly involves a final review and minor edits. |
| Advanced Features | None. All features (like speaker labels) are manual. | Built-in features like speaker ID and auto-punctuation. |
Ultimately, the choice depends on your volume and priorities. For a single short video, manual might be fine. For anything more, AI provides a clear advantage in efficiency.
Today's AI services offer features that go far beyond basic transcription, solving common subtitling headaches automatically.
Crucial Final Step: AI is an incredible tool, but it isn't perfect. Always treat the generated SRT file as a very good first draft. A quick human review is essential to catch any misheard words, fix proper nouns, or correct any slightly awkward phrasing. This final polish ensures your subtitles are 100% accurate and professional.
Simply having subtitles isn't enough—they need to enhance the viewing experience, not get in the way. There’s a genuine art to crafting captions that feel seamless and professional. It's all about balancing timing, length, and formatting so your audience can easily read along without feeling rushed.
Once you’ve got the basic SRT structure down, these are the little details that separate amateur subtitles from a truly professional job. Let's dive into the common readability issues I see and how to fix them.
The absolute golden rule of subtitling is readability. Your viewers are there to watch a video, not read a novel. Throwing dense blocks of text at them is a surefire way to make them tune out.
To avoid this, stick to these industry best practices:
Following these simple rules makes a massive difference in how accessible and professional your subtitles feel.
Expert Insight: A subtitle should stay on screen just long enough for the average person to read it once. I've found that a minimum of one second and a maximum of around seven seconds is the sweet spot. Leaving text on screen for too long is just as distracting as flashing it by too quickly.
Your video's audio is so much more than just dialogue. You've got music, sound effects, and background noises that all add to the atmosphere. For viewers who are deaf or hard of hearing, describing these non-speech elements is essential for a complete experience.
When you create a srt file, use brackets to describe these crucial sounds.
[phone rings] or [door creaks][upbeat music playing] or [dramatic score swells][indistinct chatter]Adding this extra context makes your video far more inclusive and immersive.
Before you consider the job done, your final step should always be validation. I can't tell you how many times a tiny formatting error—like using a comma instead of a period in a timestamp—has rendered an entire SRT file useless.
Thankfully, you don't have to scan every line by hand. There are plenty of free online SRT validators that will check your file for formatting errors in an instant. You just upload the file, and it flags any problems.
This simple check takes seconds and can save you from a major headache down the line, ensuring your subtitles load perfectly on any platform.
Even with the best tools, a few hiccups are common when you're just starting to create SRT files. Let's walk through some of the questions I see pop up all the time and clear up the confusion. Think of this as your personal troubleshooting guide for the most frequent SRT puzzles.
Getting these little details right is the difference between subtitles that just work and subtitles that work everywhere.
This one is simple: UTF-8 encoding. Always. It's not just a recommendation; it's pretty much a requirement for making sure your subtitles are universally compatible.
Why does it matter so much? UTF-8 is the standard that ensures special characters, accents (like in the word "résumé"), and even emojis show up correctly on any device or platform. If you save it with a different encoding, you're rolling the dice. You might end up with garbled text that looks like †or ??? instead of the words you wrote.
Most basic text editors, from Notepad on Windows to TextEdit on Mac, give you an option to choose the encoding in the "Save As" window. Just make a habit of selecting UTF-8, and you'll save yourself a world of future headaches.
Nope. The SRT format is built for simplicity and doesn't support any kind of styling. You can't add colors, change fonts, or even use bold and italics directly in the file. Its power comes from being plain text, which is exactly why it’s supported almost everywhere.
If you absolutely need more creative control over how your subtitles look, you'll have to switch to a different format. A couple of common ones are:
Just be aware that with more visual flair comes less universal support. The humble SRT file will play on far more devices and platforms.
My Two Cents: Stick with SRT for maximum reach and compatibility. Only venture into formats like .ass if visual styling is a non-negotiable part of your project, and be prepared for a more complex workflow.
Out-of-sync subtitles are probably the most frustrating issue you'll encounter. How you fix it really depends on what's causing the problem.
Is the timing off by a consistent amount? For example, are the subtitles always two seconds late? That's an easy fix. Most good subtitle editors, and even media players like VLC, let you apply a global time offset. You can just tell it to shift all the timestamps forward or backward by a specific amount.
The trickier problem is when the sync gets progressively worse over time. If the subtitles start out fine but are way off by the end of the video, you're likely dealing with a frame rate mismatch. For that, you’ll need a more powerful tool like Subtitle Edit to properly stretch or compress the subtitle timeline to match the video's actual timing.
Ready to skip the troubleshooting and get perfectly synced subtitles in minutes? Lemonfox.ai has a powerful Speech-to-Text API that automatically generates accurate, timestamped SRT files for you. Try it for free and see how easy captioning can be.