First month for free!
Get started
Published 11/19/2025
If you've ever dealt with video, you've almost certainly come across SRT files. They're the unsung heroes of video accessibility and engagement, and thankfully, they're incredibly straightforward to work with. Think of an SRT file as a simple text document that tells a video player exactly what text to show and when to show it. This universal format is the reason you can add captions to videos on YouTube, Vimeo, and just about any other platform out there.
At its core, an SRT (which stands for SubRip Subtitle) file is a plain text file that follows a very specific, yet simple, structure. It was originally developed back in 2000 for a DVD-ripping tool called SubRip, but its simplicity made it the go-to standard. In fact, it became the de facto format when YouTube adopted it back in 2008. You can learn more about its humble beginnings over on Wikipedia's SubRip page.
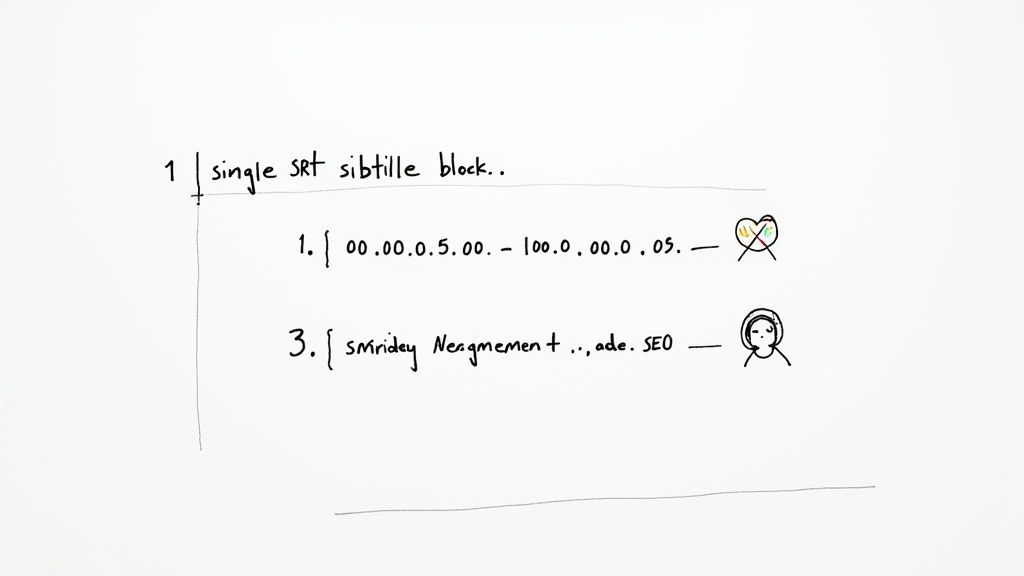
Each caption you see on screen is just a small block of text in the SRT file, and every block has three key parts: a number to keep things in order, a timestamp for timing, and the actual subtitle text.
But why bother with them at all? The impact is bigger than you might think. Beyond the obvious benefit of making content accessible for viewers who are deaf or hard of hearing, subtitles have a massive effect on engagement. Some studies show they can increase watch times by up to 40%. They also give your content a nice SEO boost, as search engines can crawl and index the text within your captions.
With compatibility across more than 100 different platforms and players, learning to create and use SRT files is a skill that pays dividends.
To really get a feel for how an SRT file works, it helps to see the components broken down. It’s the same simple pattern, repeated over and over for each line of dialogue.
This table gives you a clear snapshot of each part.
| Component | Example | Purpose |
|---|---|---|
| Sequence Number | 1 | A simple counter that keeps every subtitle block in the correct order. |
| Timestamp | 00:00:05,000 --> 00:00:07,500 | Tells the player the exact start and end time for displaying the text. |
| Subtitle Text | Hello world! | The actual caption that will appear on the screen for the viewer to read. |
As you can see, there’s no complex code here—just a logical, easy-to-read structure that synchronizes text with your video’s timeline.
If you're creating video content, getting a handle on SRTs is a game-changer. It's about more than just accessibility; it's about control and efficiency.
The real-world impact is undeniable. Platforms have reported that a staggering 73% of users are more likely to finish a video if it has captions. Think about all the times you've watched a video on your phone in a loud place—captions were probably the only reason you stuck around.
The Big Takeaway: A simple text file can dramatically widen your audience. By improving accessibility, catering to different viewing habits, and boosting your video's search visibility, SRTs help you connect with more people.
Now that you've got the "why" and the "what" down, we can get into the "how." The next sections will walk you through creating these files yourself, both by hand and with some powerful automated tools. Let's dive in.
While automated tools are fantastic for getting a first draft done quickly, sometimes you just need the fine-tuned control that only comes from doing it yourself. Manually creating an SRT file gives you ultimate precision, which is perfect for short videos, making quick fixes to an existing file, or just for understanding how subtitles are built from the ground up.
All you really need is a basic text editor—think Notepad on Windows or TextEdit on a Mac. The process is straightforward: you transcribe the audio and then meticulously assign timestamps to each line of dialogue. It’s a deliberate, focused task, but the payoff is having complete authority over the final product. You decide the exact moment a subtitle appears and vanishes, ensuring the timing flows perfectly with the speaker's natural rhythm.
Every single subtitle entry in an SRT file follows a strict, four-part structure. This format is non-negotiable; even a tiny error, like a misplaced comma, can make the whole file unreadable by a video player.
Think of it as a simple recipe you repeat for every snippet of dialogue. Each entry must have:
1, then 2 for the next one, and so on.hours:minutes:seconds,milliseconds --> hours:minutes:seconds,milliseconds. For example: 00:00:14,215 --> 00:00:16,800.Forgetting that blank line is easily the most common mistake people make. Always double-check your work to make sure it's there.
Let's be honest, typing the words is the easy part. The real challenge is getting the timing just right. My go-to method is to have my video player and text editor open side-by-side. I'll play a small chunk of the video, listen for a complete thought or phrase, and then hit pause.
Pro Tip: Your video player's timeline is your best friend here. Scrub through the video to find the exact moment a person starts speaking and jot down that time. Then, play it until they finish that phrase and note the end time. That level of precision is what makes subtitles feel professional instead of distracting.
With the start and end times noted, I build the SRT block in my text editor. For example, if someone says, "Welcome to our tutorial," starting at the 2.5-second mark and finishing at 5 seconds, the entry looks like this:
100:00:02,500 --> 00:00:05,000Welcome to our tutorial.
Then, it’s just a matter of repeating the process: play, pause, note the times, and transcribe. For anything longer than a few minutes, I recommend taking a break every 10-15 minutes. It’s tedious work, and stepping away helps maintain focus and accuracy.
When you're all done, the final step is crucial. Go to "Save As" in your text editor. In the "Save as type" dropdown, select "All Files," and then name your file with a .srt extension (e.g., my-video.srt). If you save it as a .txt file by mistake, it simply won't work.
Let's be honest: creating SRT files by hand gives you incredible control, but it's a massive time sink. It just doesn't scale. If you're a content creator juggling dozens of videos or a developer building out a media application, the manual process of transcribing and timing every line quickly becomes a major bottleneck.
This is exactly where a good Speech-to-Text API changes the game.
An API like the one from Lemonfox.ai can take a whole video's audio and turn it into structured, usable data—complete with word-level timestamps—in just a few minutes. Instead of manual labor, you have a programmatic workflow that generates accurate SRT files every time. This saves countless hours and keeps your subtitles consistent across all your content.
This infographic really simplifies the manual work that an API completely automates.
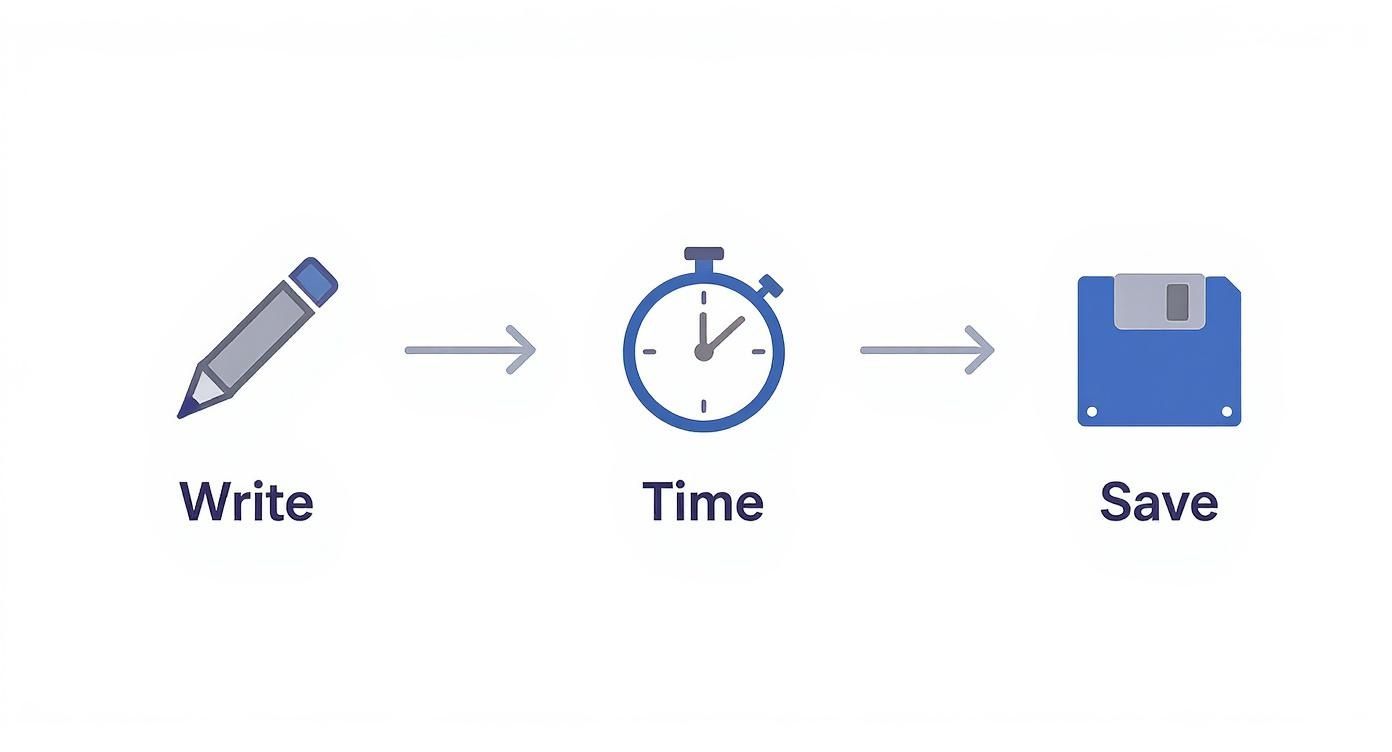
Think about it: writing, timing, and saving are all tedious tasks. An automated system handles them almost instantly, freeing you up to focus on the creative side of things.
Getting started is surprisingly straightforward. You just need to send your audio or video file to the Lemonfox.ai API endpoint, which you can do with a simple HTTP request from your code. The API just needs your API key for authentication and the media file you want to transcribe.
For example, if you're using Python, the requests library makes this a breeze.
import requests
api_key = 'YOUR_LEMONFOX_API_KEY'
file_path = 'path/to/your/audio.mp3'
url = 'https://api.lemonfox.ai/v1/audio/transcriptions'
headers = {'Authorization': f'Bearer {api_key}'}
with open(file_path, 'rb') as audio_file:
files = {'file': audio_file}
response = requests.post(url, headers=headers, files=files)
transcription_data = response.json()
print(transcription_data)
The API doesn't spit out a finished SRT file. Instead, you get a much more valuable JSON object. This contains the full transcript broken down with detailed timing information for every single word—the perfect raw material for building a high-quality SRT file.
The push for this kind of automation isn't just about convenience. Over 80% of online videos now use captions, and data shows subtitles can boost viewer engagement by up to 40%. As a result, the market for automatic subtitle generation has been growing by about 20% annually worldwide. If you want to dig deeper into these trends, Sally.io's detailed blog post is a great resource.
The clever part is turning that JSON response into a perfectly formatted SRT file. The raw data usually comes as a list of words, each with its own start and end time. Your job is to write a script that groups these words into logical subtitle blocks and formats them into the SRT standard.
A good approach is to group words into chunks that last a few seconds or stay under a certain character limit. You could, for instance, create a new subtitle block every 10 words or every 3 seconds, whichever comes first.
Here’s a basic JavaScript snippet to give you an idea of how you could process the API's output to create SRT files.
function formatTime(seconds) {
const date = new Date(0);
date.setSeconds(seconds);
return date.toISOString().substr(11, 12).replace('.', ',');
}
function createSrtFromResponse(data) {
let srtContent = '';
let counter = 1;
// Assume 'data.words' is an array of {word, start, end}
// Logic to group words into subtitle chunks would go here
const subtitleChunks = groupWords(data.words);
subtitleChunks.forEach(chunk => {
    const startTime = formatTime(chunk.startTime);
    const endTime = formatTime(chunk.endTime);
    const text = chunk.text;

    srtContent += `${counter}\n`;
    srtContent += `${startTime} --> ${endTime}\n`;
    srtContent += `${text}\n\n`;
    counter++;
});

return srtContent;
}
The Key Insight: An API doesn't just transcribe; it provides the raw timing data needed for precision. By using word-level timestamps, you can build subtitles that are perfectly synced, avoiding the awkward delays often seen in less sophisticated auto-captioning tools. This level of control is what bridges the gap between manual quality and automated efficiency.
Before we dive into the nitty-gritty of formatting, take a look at this quick video. It does a fantastic job of showing what separates good subtitles from great ones.
Creating subtitles that actually help your audience, rather than distract them, comes down to a few key principles. The goal is always readability and flow.
Think about how people read. Long, sprawling lines of text are a nightmare to follow while also trying to watch what's happening on screen. A good rule of thumb is to stick to 32-42 characters per line. This is the sweet spot that prevents viewers from feeling overwhelmed.
Just as important is where you break those lines. Don't just let the text wrap wherever it wants. You want to create line breaks at natural pauses in the sentence, like at a comma or between clauses. This makes the text feel much more intuitive to read.
Pacing is everything. It's the invisible hand that guides the viewer's experience, and getting it wrong can be incredibly jarring.
A subtitle should stay on screen just long enough for an average person to read it comfortably, which is generally somewhere between 1.5 and 6 seconds. Anything less is a flash; anything more, and it lingers awkwardly.
Here are a few pointers to nail the timing:
When a fast exchange has poorly timed captions, it just feels off. While automated tools are great for getting you started, you might find you need to make small adjustments. Sometimes, a global timing shift of just 0.5 seconds can improve readability by a massive 30%.
In any conversation with multiple people, you need to make it clear who's talking. A simple hyphen or the speaker's name at the start of the line is all it takes to avoid confusion. You can use formats like - Sarah: for clarity or just a plain hyphen if the context makes it obvious.
And don't forget the non-speech cues! Sounds like [laughter], [music playing], or [door closes] add a rich layer of context. These cues are essential for accessibility, giving viewers who are deaf or hard of hearing the same situational awareness as everyone else.
To make this easier, here's a quick checklist to keep in mind.
This simple table helps you spot common mistakes and turn them into professional habits. Reviewing your subtitles against this list is a great way to ensure a high-quality result.
| Aspect | Avoid This | Do This Instead |
|---|---|---|
| Line Length | A single, sprawling 50-character line that's hard to scan. | Break it into two lines, each between 32-42 characters. |
| Line Breaks | Splitting phrases awkwardly in the middle of a thought. | Break lines at natural pauses, like after a comma or clause. |
| Speaker ID | Leaving the viewer guessing who is speaking during a conversation. | Add a simple - Name: or - to identify the speaker. |
| Sound Cues | Ignoring important background sounds that add meaning. | Include non-speech cues like [phone rings] for context. |
A quick check like this before you finalize your file can save you a lot of headaches and dramatically improve the viewing experience.
Before you hit publish, always do a final pass. Open the video and the SRT file in a media player like VLC and watch it through.
Also, remember to test your video on different devices. What looks perfect on your desktop monitor might have font scaling or fitting issues on a small mobile screen.
-c:s mov_text command works great for MP4 compatibility.Whether you're attaching an SRT file for a player to use or burning it directly into the video, you're making your content more accessible and professional.
Think of it this way: quality subtitles are a silent ambassador for your content.
Sometimes, even with the best tools, the timing can be slightly off. For fine-tuning individual timestamps, a dedicated subtitle editor like Aegisub gives you precise control.
Most editors also have features for "chunk editing." This is a lifesaver when you realize an entire section is off by a second or two.
This kind of workflow, where you blend automated transcription with a few manual tweaks, gives you the best of both worlds: speed and accuracy.
If you’re creating subtitles for different languages, organization is key. Always maintain one SRT file per language to prevent any messy overlaps or errors.
Make sure your non-speech cues are also localized. An English-speaking audience understands [applause], but a Spanish-speaking one will be looking for [aplausos].
video-title.en.srt and video-title.es.srt.Properly translated and timed subtitles are crucial for preserving your message and keeping international viewers engaged. When your subtitles are adaptive and feel natural, you've done your job right.
So, you've got your shiny new SRT file. What's next? Getting it to play with your video is the final piece of the puzzle, and luckily, it's usually pretty simple. Whether you're just doing a quick check, prepping for a social media post, or making those last-minute tweaks, knowing how to handle the file is key.
The fastest way to test your subtitles is to "side-load" them. It sounds technical, but it just means dropping the .srt file into the same folder as your video. Just make sure they share the exact same filename, like my-awesome-video.mp4 and my-awesome-video.srt.
Fire up a media player like the trusty VLC, and it will almost always pick up the subtitle file automatically. You'll see your text appear right on the video.
When you're ready to share your video with the world, you have two main choices: attach the file as closed captions or permanently burn them into the video itself.
Closed Captions (The Flexible Route): Platforms like YouTube and Vimeo are built for this. You just upload your SRT file alongside your video, and it becomes optional closed captions (CC). This is fantastic for accessibility, as it gives viewers total control. It’s the standard for a reason.
Burned-In Subtitles (The Permanent Route): This is often called "hardcoding." It literally stamps the text onto the video frames, making it a permanent part of the image that can't be turned off. This is your go-to method for platforms that don't support separate subtitle files, like a standard Instagram post. A powerful, free tool like FFmpeg is the industry standard for this kind of work.
My Two Cents: Always choose to attach the SRT as closed captions if the platform allows it. It’s better for SEO and gives your audience a better experience. Only burn them in when you absolutely have to.
Even the best automated transcription tools aren't perfect. You'll almost always find a small timing issue or a misspelled word that needs fixing. Sure, you could open the .srt in a plain text editor and do it manually, but there's a much better way.
Dedicated subtitle software makes this part of the job a breeze. These tools give you a visual timeline, so you can see exactly where your subtitles line up with the audio waveform.
Here are a couple of my favorite free options:
| Software | Best For | Key Features |
|---|---|---|
| Subtitle Edit | All-around editing & conversions | Visual timeline, bulk timestamp shifting, spell check, and supports dozens of formats. It's a true workhorse. |
| Aegisub | Advanced styling & precise timing | Great for karaoke-style subtitles or when you need perfect, frame-accurate sync. It excels with Advanced SubStation Alpha (ASS) styling. |
These programs are lifesavers for fixing sync issues. For instance, if you notice an entire scene's subtitles are off by half a second, you can just select all the lines in that section and apply a time shift. It’s way faster than editing every single timestamp by hand. This final polish is what separates an amateur-looking video from a professional one.
Once you get into the rhythm of creating SRT files, you'll inevitably run into a few common sticking points. These are the kinds of practical, real-world questions that pop up for everyone, from beginners to seasoned pros. Getting these sorted out early will save you a ton of headaches later.
Let's dive into some of the most frequent questions I hear to help you smooth out your subtitling process.
Think of it this way: SRT is the old, reliable standard, while VTT is its more modern, web-savvy cousin. An SRT file is just plain text and timestamps, which is why it works with pretty much every video player out there. It's the dependable workhorse of the subtitle world.
VTT (which stands for WebVTT) was specifically built for HTML5 and modern web video. This means it comes with some extra bells and whistles that SRT just doesn't have.
So, what's the bottom line? If you need simple, universally compatible subtitles, stick with SRT. If you're working on a web project and need more control over the look and feel, VTT is your best bet.
You absolutely can. Basic formatting is possible using simple HTML-style tags. The two you'll use most often are <b> for bolding text and <i> for italics.
For instance, a line in your SRT file might look like this:I think this is an <i>extremely</i> important point.
A Word of Caution: Just because you can do it doesn't mean it will work everywhere. While most modern players handle these tags just fine, some older or more basic ones might ignore them completely or, even worse, show the raw tags as plain text. My advice? Always test your final SRT file on the platform where it will be viewed.
There's nothing more distracting than subtitles that are out of sync. It's probably the most common (and annoying) problem you'll encounter. The good news is that it's usually an easy fix. More often than not, the entire file is just offset by a consistent amount—all the timestamps are either too early or too late.
You don't need to go through and painstakingly edit every single timestamp. There are much smarter ways to handle it.
Tired of all the manual tweaking? You can generate perfectly synced subtitles in just a few minutes. Lemonfox.ai offers a seriously accurate and affordable Speech-to-Text API that can create SRT files from any audio or video for less than $0.17 per hour. Start your free trial today and automate your subtitling workflow.