First month for free!
Get started
Published 2/5/2026

So, you need to create a WAV file.So, you need to create a WAV file. You've got a few options, from quick command-line conversions to generating one from scratch with code. You can fire up a tool like FFmpeg and run a simple command (ffmpeg -i input.mp3 output.wav), use a library in Python or Node.js, or just export from your favorite digital audio workstation.
Before we jump into the "how," let's take a quick look at the most common ways to get the job done.
This table gives you a bird's-eye view of the methods we'll cover. Think of it as a cheat sheet to help you pick the right tool for your specific task.
| Method | Best For | Tools Needed |
|---|---|---|
| Command-Line Tools | Quick conversions, batch processing, and automation | FFmpeg, SoX (Sound eXchange) |
| Programming (Python) | Generating audio from data, custom processing, and web apps | wave module, pydub, SciPy |
| Programming (Node.js) | Server-side audio generation, real-time applications | node-wav, fluent-ffmpeg |
| Programming (C/C++) | High-performance audio synthesis, embedded systems | Standard libraries, libsndfile |
| Text-to-Speech APIs | Converting text into spoken audio files | Cloud services (e.g., Google Cloud TTS, ElevenLabs) |
Each of these has its place, whether you're building a complex audio application or just need to convert a few files in a hurry. Now, let's get into the details.
Before writing any code, it’s worth asking: why is a format from 1991 still so essential for developers? While formats like MP3 and AAC rule the consumer world with their clever compression, developers often need something much more direct and predictable.
The WAV format’s biggest advantage is its raw, uncompressed nature. Simple as that.
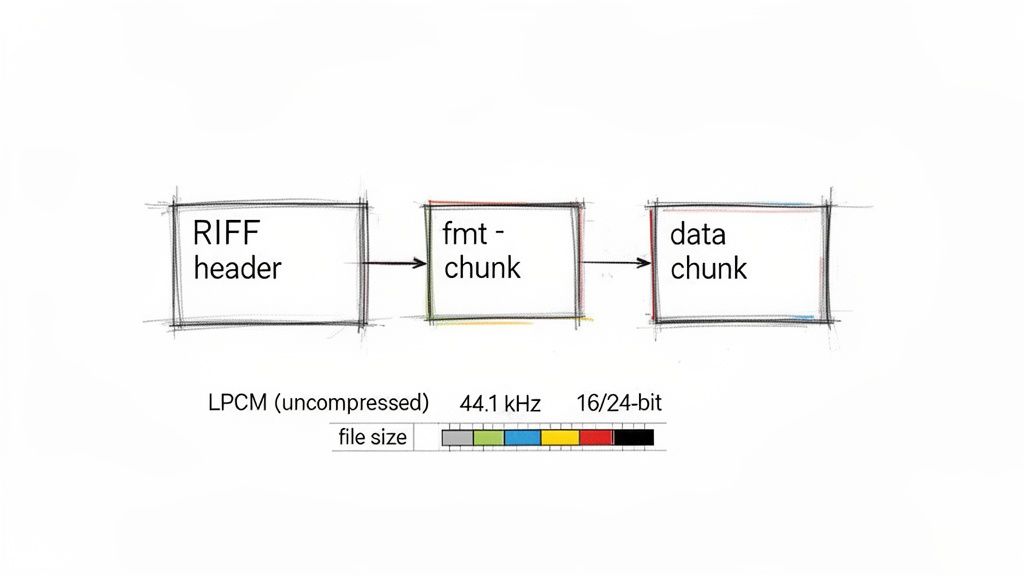
WAV files typically store audio using Linear Pulse-Code Modulation (LPCM). This is a fancy way of saying the audio is saved as a direct series of raw amplitude values—no complex algorithms, no decoding gymnastics needed. It’s just a straightforward stream of data that maps directly to the sound wave, making WAV the gold standard for any application where audio fidelity is absolute king.
When you create a WAV file, you're essentially making a perfect digital copy of the original sound. This lossless quality is non-negotiable in a surprising number of fields:
Another reason WAV has stuck around is its brilliantly simple architecture, known as the Resource Interchange File Format (RIFF). A WAV file is just a header with some metadata followed by distinct "chunks" of data. The header tells you things like the sample rate, bit depth, and channel count, while the main data chunk holds the actual audio samples.
This transparent layout makes WAV files incredibly easy to parse and manipulate programmatically. You don't need a complex library just to read the raw audio data.
Microsoft and IBM introduced the format way back in August 1991 as a core part of multimedia for Windows 3.1. Today, its legacy is massive. As of April 2024, the Library of Congress holds over 176 terabytes of .wav files, a clear sign of its dominance in digital preservation. You can read more about its history and technical specs in this excellent digital preservation guide.
This blend of historical stability and straightforward design is exactly why learning to create a WAV file is still a fundamental skill for any developer working with audio.
For anyone who spends their days in a terminal, command-line tools are often the quickest, most efficient way to get things done. When it comes to audio, FFmpeg and SoX are the titans. Think of them as the Swiss Army knives for audio manipulation; they can handle just about any conversion or generation task you can imagine.
Why the command line? It's all about speed, precision, and automation. Instead of clicking through menus in a GUI, you can craft a single command to control every last detail of your WAV file. This is a game-changer for batch processing thousands of files or building automated audio workflows.
FFmpeg is the undisputed king of multimedia processing. While many know it for video, its audio prowess is second to none. A classic real-world scenario is converting a compressed format like an MP3 into a high-fidelity WAV file, perfect for editing, analysis, or archiving.
Let's say you have an MP3 and need a CD-quality WAV from it. Here’s the command I’d use:
ffmpeg -i input_audio.mp3 -ar 44100 -ac 2 -c:a pcm_s16le output_audio.wav
So, what’s going on under the hood here?
pcm_s16le codec, which is just signed 16-bit little-endian PCM—the bread and butter of standard WAV files.The FFmpeg homepage is a great resource, immediately highlighting its cross-platform nature and its role as a complete framework for all things multimedia.
Next up is SoX, the "Sound eXchange." I often reach for SoX when I need to generate audio from scratch, which is incredibly handy for creating test files.
Imagine you're developing an application that needs to process audio. You need a consistent, predictable input to make sure everything works as expected. With a simple command, you can generate a 10-second silent WAV file with very specific properties:
sox -n -r 48000 -c 1 -b 24 silent_mono_24bit.wav trim 0 10
This command whips up a silent, mono, 24-bit WAV file with a sample rate of 48 kHz. The -n flag means there’s no input file, and trim 0 10 sets the duration. It's a clean, reproducible way to create placeholder audio for any project.
Pro Tip: I lean on SoX constantly to generate sine waves at specific frequencies, like a 1 kHz tone. It's a lifesaver for debugging audio filters or checking if a playback system is working correctly without having to hunt down pre-recorded files.
While command-line tools are fantastic for automation and quick tasks, sometimes a visual approach is better. Many developers and creators use free recording software to capture audio from microphones or other inputs. These apps give you a hands-on interface for recording, which you can then export as a pristine WAV for further processing. Knowing how to use both gives you a truly flexible audio toolkit.
Command-line tools are fantastic for one-off conversions, but if you're building any kind of audio application, you'll want to create WAV files directly in your code. Python is a beast for this, with a couple of great libraries that give you total control over the process. This is the way to go when you need to synthesize audio from data, build dynamic soundscapes, or integrate audio generation into a bigger software pipeline.
The basic idea is often to take some source audio (like an MP3) and convert it into the uncompressed WAV format, a process that’s super easy to automate in a Python script.
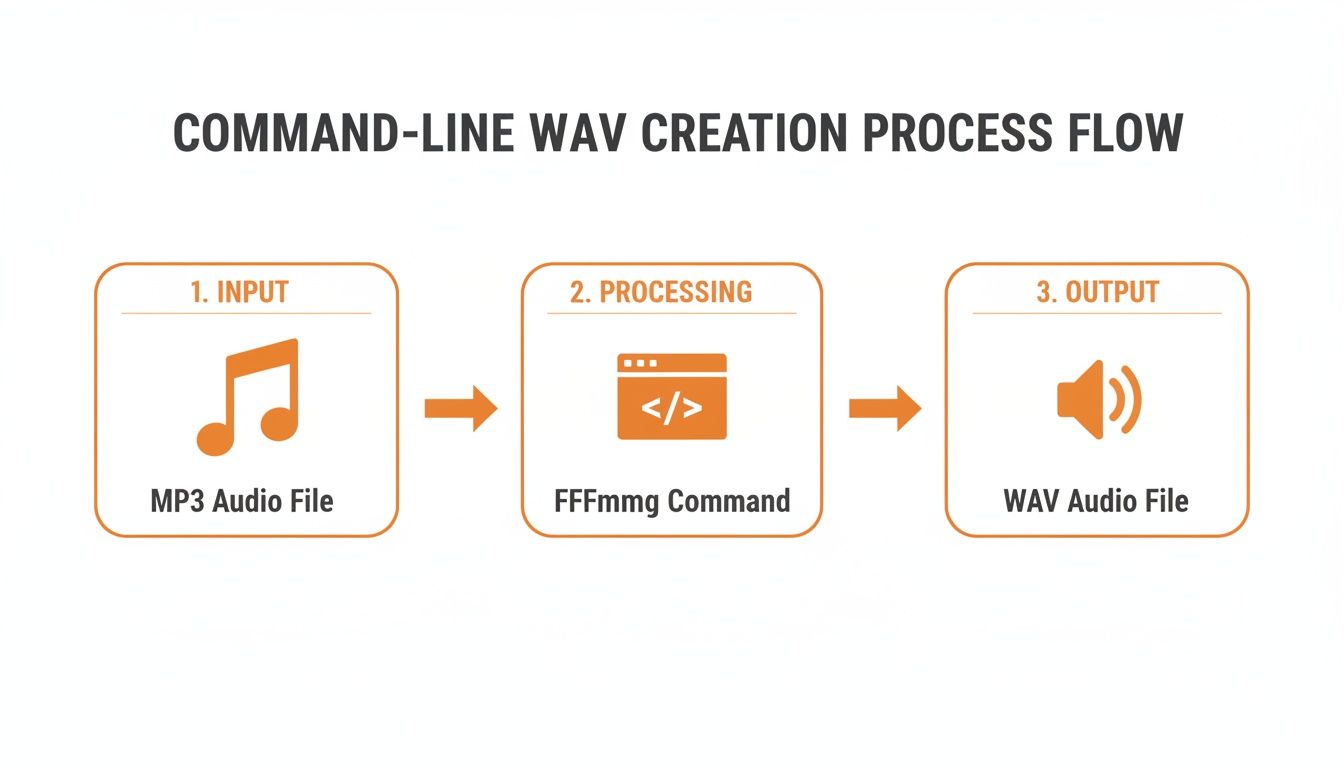
This flow is exactly what we can replicate and control with code. Let's dig into how.
wave ModuleIf you really want to understand how a WAV file is put together, Python's built-in wave module is the best place to start. It doesn't require any external downloads, and it forces you to think about the file's structure from the ground up. You’ll be setting parameters and writing raw byte data, which gives you a fantastic feel for how audio data is actually stored.
Here’s a classic example: creating a simple sine wave tone from scratch.
import wave import struct import math
sample_rate = 44100.0 # Samples per second (CD quality) duration = 1.0 # Seconds frequency = 440.0 # A4 note n_channels = 1 # Mono samp_width = 2 # Bytes per sample (16-bit)
with wave.open('a4_tone.wav', 'w') as wav_file: # Set the parameters for the WAV file header wav_file.setnchannels(n_channels) wav_file.setsampwidth(samp_width) wav_file.setframerate(sample_rate)
# Calculate the amplitude and generate the audio frames
max_amplitude = 2**(samp_width * 8 - 1) - 1
n_frames = int(duration * sample_rate)

for i in range(n_frames):
    value = int(max_amplitude * math.sin(2 * math.pi * frequency * i / sample_rate))
    # Pack the integer value into a binary format ('<h' is a signed short)
    data = struct.pack('<h', value)
    wav_file.writeframesraw(data)
In this snippet, we're manually setting the channel count, bit depth, and sample rate. The real magic happens with struct.pack, which takes our calculated integer amplitudes and turns them into the binary data the WAV file expects. It's low-level, but it gives you ultimate control.
pydubWhen you just need to get the job done quickly and don't want to mess with the low-level details, pydub is the library you want. It’s a high-level tool that abstracts away all the complexity of file formats, letting you manipulate audio with simple, chainable commands. It's perfect for tasks like slicing audio clips together, applying effects, or generating tones with just a couple of lines of code.
I’ve found
pydubincredibly useful for creating custom sound masking tracks. For example, you can programmatically generate a brown noise signal, mix it with a looped recording of a fan, and export the whole thing as a single WAV. This creates a much more natural and effective soundscape for blocking out distractions than a simple, static white noise generator.
Let's see how much easier it is to create that same 440 Hz tone with pydub.
from pydub import AudioSegment from pydub.generators import Sine
sine_wave = Sine(440).to_audio_segment(duration=1000)
sine_wave.export("a4_tone_pydub.wav", format="wav")
The difference is night and day. With just two lines of meaningful code, pydub takes care of the header, the data packing, and writing the file to disk. This efficiency makes it my go-to choice for rapid prototyping and building more complex audio workflows where I don't need to get bogged down in the file format's nitty-gritty details.
Python is a go-to for audio work, but it’s far from the only game in town. The good news is that the core logic for creating a WAV file is the same no matter what language you use. You're always tackling the same two-part problem: construct a valid header, then write your raw audio data.
Let's look at how you'd do this in a couple of other popular environments—Node.js for web and server-side apps, and C/C++ for when you need to get closer to the metal.
If you're a JavaScript developer building a backend service, you'll find plenty of great tools for audio. One of the most straightforward is the node-wav library, which is perfect for taking raw PCM data and wrapping it into a proper WAV file.
This comes in handy all the time. Maybe you're processing an audio stream from a third-party API or generating sound effects on the fly for a web application. You’ve got a raw audio buffer, and you just need to make it a playable WAV.
With node-wav, it's just a few lines of code.
const wav = require('node-wav'); const fs = require('fs');
// Let's create some sample data—a simple audio ramp const sampleRate = 44100; const duration = 1; // 1 second const numSamples = sampleRate * duration; const channelData = new Float32Array(numSamples);
for (let i = 0; i < numSamples; i++) { // A simple ramp from -1.0 to 1.0 channelData[i] = (i / numSamples) * 2 - 1; }
// Now, encode that buffer into the WAV format const wavData = wav.encode([channelData], { sampleRate: sampleRate, float: true, bitDepth: 32 });
// And finally, write it to a file fs.writeFileSync('output.wav', wavData);
The library handles all the tricky header construction for you. It's a clean, efficient way to get the job done without getting bogged down in the low-level details, which is exactly what you want for most web-related audio tasks.
When performance is everything, or you're working on something like an embedded system, nothing beats the raw power and control of C or C++. In this world, you typically create WAV files by writing the header manually, byte-by-byte, followed by your raw PCM data. This approach completely cuts out library overhead, giving you total control over the file.
I can't overstate how valuable this skill is for debugging. When you build a WAV header by hand, you gain this deep, intuitive feel for how chunk sizes, sample rates, and bit depths all fit together. It makes diagnosing corrupted files or weird compatibility bugs so much easier down the road.
The whole process boils down to defining a struct that perfectly mirrors the WAV header format, and then writing that struct and your audio data into a binary file.
Here’s the basic playbook:
struct in C/C++ that maps directly to the RIFF and FMT chunks. It needs fields for RIFF, WAVE, fmt , chunk sizes, audio format, channel count, sample rate, byte rate, and bit depth.ChunkSize and Subchunk2Size based on the exact amount of audio data you're about to write."wb"). Write the header struct to the file first. Then, immediately follow it by writing your entire buffer of raw PCM audio data.This technique gives you unmatched performance and is a foundational skill if you're serious about audio programming in environments where every CPU cycle and byte of memory matters.
Once you've got the basics down, you'll start running into the kind of challenges that separate hobbyist projects from professional, production-grade audio work. This is where a deeper understanding of the WAV format really pays off.
From embedding crucial metadata for broadcast workflows to handling files that push past the old size limits, these skills are essential for anyone serious about audio development. Let's dig into some of the most common hurdles you'll face and how to clear them.
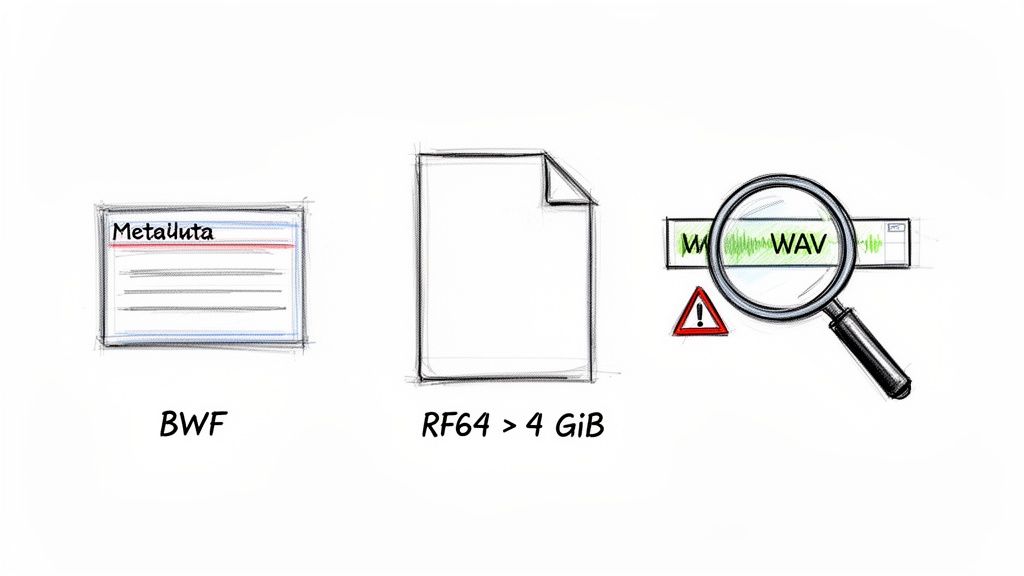
In the professional audio world, context is king. A standard WAV file gives you the technical specs, but it doesn't tell you anything about what the audio actually is. This is the problem the Broadcast Wave Format (BWF) was created to solve.
BWF is just a WAV file with an extra chunk of data—the Broadcast Audio Extension, or bext chunk. This little addition is a game-changer because it can store vital metadata right inside the file.
Tools like FFmpeg make it easy to add a bext chunk during file creation, ensuring your audio files are ready to drop straight into a professional post-production pipeline.
For a long time, the WAV format had a hard ceiling: a file could not be larger than 4 gibibytes (GiB). This limitation, a result of its 32-bit header architecture from 1991, became a massive headache as audio resolutions increased. By the mid-2000s, that 4 GiB cap meant you could only get about 6.8 hours of CD-quality stereo audio.
The solution arrived in 2006 with RF64, a specification from the European Broadcasting Union that extended the format to use 64-bit headers. Suddenly, the size limit was practically gone. For a deeper dive into how this all came about, check out the excellent explanation of WAV format evolution on trptk.com.
This innovation, often called RIFF64, is now standard in modern tools like SoX and recent FFmpeg builds. It allows you to create multi-hour, high-resolution recordings without ever worrying about hitting that old file size wall.
My personal rule of thumb: if I'm recording anything longer than a podcast episode at high quality, I default to RF64. It prevents nasty surprises and ensures I never hit that 4 GiB wall mid-session.
When you start creating WAV files programmatically, things can and do go wrong. Here are a few common gremlins I’ve run into over the years and how to fix them:
Corrupted Headers: If a file refuses to play, the header is the first place I look. A single incorrect byte in a field like the sample rate or chunk size can make the whole file unreadable. Use a hex editor or a command-line tool like ffprobe to inspect the header and double-check that the values match your audio data.
Incorrect Chunk Sizes: This is a classic mistake. If you miscalculate the Subchunk2Size (which is just the size of the raw audio data), you’ll see weird behavior. Playback might stop abruptly, or the audio player will show the wrong duration. Always make sure this value is calculated correctly: NumSamples * NumChannels * BitsPerSample / 8.
Audio Clicks and Pops: Hearing a sharp click at the start or end of your audio? That's usually caused by a discontinuity in the waveform right at the edge of your buffer. The fix is surprisingly simple: apply a tiny fade-in and fade-out, even just a few milliseconds. It’s enough to smooth the transition and get rid of that annoying noise.
So far, we've been working with WAV files created from existing audio or raw data. But what happens when the source isn't audio at all, but plain text? This is where Text-to-Speech (TTS) APIs come in, offering a modern and surprisingly powerful shortcut.
Instead of setting up a microphone or diving deep into synthetic tone generation, you can just send a string of text to an API. In return, you get a high-quality, human-like voice recording, ready to go. This whole approach sidesteps the usual headaches of recording and synthesis, which is a lifesaver for applications that need to scale. Think about automatically creating audio prompts for an IVR system, generating voiceovers for tutorial videos, or building out accessibility features for a website.
The actual process is refreshingly simple. Most TTS providers, including the developer-friendly Lemonfox.ai Text-to-Speech API, give you a straightforward REST endpoint. All you have to do is send your text along with some configuration choices (like the voice you want and your desired output format), and you get an audio stream back.
Here's a quick look at how you could use Python's excellent requests library to turn a simple sentence into a playable WAV file.
import requests
API_KEY = "YOUR_LEMONFOX_API_KEY" TTS_URL = "https://api.lemonfox.ai/v1/audio/speech"
headers = { "Authorization": f"Bearer {API_KEY}", "Content-Type": "application/json" }
payload = { "model": "lemon-mist", "voice": "alloy", "input": "Hello world! This is a test of the text to speech API." }
response = requests.post(TTS_URL, headers=headers, json=payload)
if response.status_code == 200: with open("output_tts.wav", "wb") as audio_file: audio_file.write(response.content) print("WAV file created successfully!") else: print(f"Error: {response.status_code} - {response.text}")
This little script takes care of everything from authentication to sending the text and then writing the binary audio data it receives straight into a new file, output_tts.wav.
Choosing a TTS API over manual recording or programmatic generation isn't just a matter of convenience; it brings some serious strategic advantages, especially for developers looking to build out sophisticated audio features without getting bogged down.
If you’re exploring different AI-driven ways to produce voice audio from text, it's also worth checking out a platform like the lunabloomai app. This kind of tool can give you a powerful and integrated workflow for creating high-quality voice audio at scale.
Even after walking through the steps, you'll inevitably run into a few specific questions when you're deep in a project. Let's tackle some of the most common ones I hear from developers.
Choosing the right bit depth really comes down to what you're trying to achieve. There’s no single “best” answer, just the right tool for the job.
For most everyday audio, think music destined for a CD or standard sound effects in an app, 16-bit is the gold standard. It gives you a fantastic dynamic range and is what most consumer audio is built around.
But if you’re doing serious audio work—like professional music production, cinematic sound design, or high-fidelity field recording—you'll want to step up to 24-bit. The extra headroom it provides is a lifesaver during mixing and mastering, helping you avoid digital clipping and capture every last nuance of the sound. For anything less demanding, 24-bit is usually overkill.
Technically, yes, but it’s incredibly rare and generally defeats the purpose of using the format in the first place. The WAV container can wrap compressed audio codecs like MP3 or ADPCM, but well over 99% of the WAV files you'll ever find in the wild contain uncompressed PCM audio.
The whole reason we reach for WAV is for its pure, uncompressed, lossless quality. Stuffing compressed audio inside a WAV container is like putting a cheap engine in a sports car—it works, but you lose the very thing that makes it special. It also breaks compatibility with a lot of tools that expect raw PCM data.
Shrinking a WAV file means tweaking its fundamental properties before you generate it. You have three main levers to pull, and each has a different impact on file size.
Change the channel count: This is the most dramatic way to cut size. Simply converting a stereo (2-channel) file to mono (1-channel) will slice the file size in half, instantly.
Lower the sample rate: Reducing the sample rate means you’re capturing fewer audio snapshots per second. Dropping from a professional 48 kHz to the CD-standard 44.1 kHz makes a noticeable difference. For voice-only recordings, you can often go as low as 22.05 kHz without much perceived loss in quality.
Reduce the bit depth: Dropping from 24-bit to 16-bit will shrink the file by a third. It’s a solid trade-off between quality and size for most applications.
Ready to integrate high-quality, scalable voice generation into your applications? Lemonfox.ai offers a powerful and cost-effective Text-to-Speech API that makes creating WAV files from text effortless. Start building with our simple API and discover why we're the most affordable premium voice solution for developers. Learn more at https://www.lemonfox.ai.