First month for free!
Get started
Published 12/20/2025

Python speech recognition gives your applications the ability to listen. It's the core technology that turns spoken words into text, paving the way for everything from voice commands and transcription services to truly interactive AI. Using Python libraries and APIs, developers can tap into this power and build some seriously cool voice-enabled features.
The ability to process human speech isn't just a gimmick anymore; it's a fundamental part of modern software. Think about the smart speakers in our homes or the apps that automatically create notes from our meetings. Python speech recognition is the engine behind these seamless interactions. And Python, with its clean syntax and incredible libraries, is the perfect language to get the job done.
This technology has leaped from research labs into our everyday lives, thanks almost entirely to massive strides in machine learning. The models we have access to today can reach staggering accuracy, making voice interfaces more reliable and genuinely useful than ever.
The numbers don't lie. The global speech recognition market exploded from USD 10.46 billion in 2018 and is projected to clear USD 17 billion by 2024. This isn't just hype; it's a direct result of machine learning models now hitting accuracy rates well over 95% in many common situations.
This growth is all about real-world applications that make our lives easier and businesses smarter. Some of the biggest drivers include:
Key Takeaway: Python's approachable nature, paired with highly effective speech recognition engines, has put voice technology into the hands of developers everywhere. You no longer need a massive team or budget to integrate sophisticated voice features into your projects.
This guide is all about getting you there. We'll walk through the practical code and steps you need to start building your own speech-powered applications in Python, from getting your environment ready to tackling the messy audio you'll find in the real world.
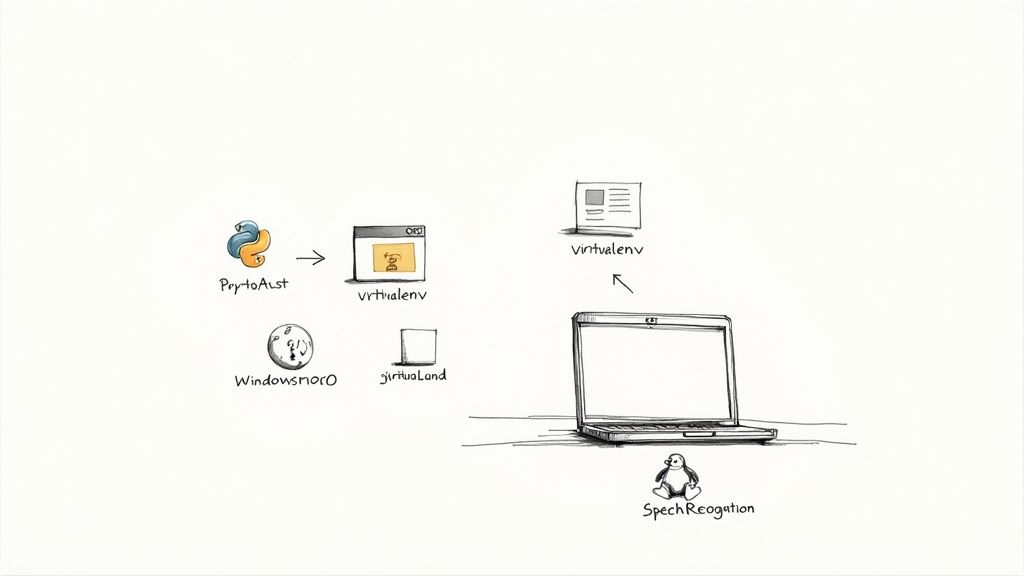
Every solid Python project, especially one involving speech recognition, starts with a properly configured environment. Before you write a single line of code, the most critical thing you can do is set up a dedicated workspace. This small step upfront will save you from a world of hurt later by keeping your project's dependencies neatly separated from everything else on your machine.
Think of it like giving your project its own sandboxed workshop. By using a virtual environment, you guarantee that the specific library versions you need for this project won't clash with those you need for another. It's a non-negotiable best practice for keeping your work reproducible and easy to share.
First things first, open your terminal and head over to your project's directory. We're going to use Python’s built-in venv module—it’s simple, effective, and gets the job done without any extra fluff.
Just run this command to create a virtual environment, which we'll call venv:python -m venv venv
After it's created, you have to "activate" it. The command is a little different depending on your operating system:
source venv/bin/activatevenv\Scripts\activateYou'll know it worked when you see (venv) pop up at the beginning of your terminal prompt. This confirms you're now working inside your isolated environment, and any libraries you install will stay right here.
With your environment up and running, it's time to bring in the tools. The workhorse for most speech recognition tasks in Python is the aptly named SpeechRecognition library. It’s essentially a clever wrapper that gives you easy access to a bunch of different speech recognition engines and APIs.
Install it with a quick pip command:pip install SpeechRecognition
Of course, to recognize speech, you first need to capture it. For grabbing audio from a microphone, PyAudio is the go-to choice. Be warned, though: this is often where people hit their first snag, as its installation can be a bit finicky due to some system-level dependencies.
A Quick Heads-Up: Getting PyAudio installed is a classic stumbling block. It relies on a system library called PortAudio, which isn't always there by default. If
pip install PyAudiofails, don't sweat it—this is a common rite of passage, and the fixes are straightforward.
If you see a wall of red text after trying to install PyAudio, it almost certainly means you're missing its dependencies. Here’s the battle plan for getting it sorted on different systems:
On Windows: The path of least resistance is to use a pre-compiled wheel file. Find the right PyAudio .whl file for your specific Python version and system (32-bit vs. 64-bit) from a reliable source like Christoph Gohlke's collection. Then, you can install it directly with pip.
On macOS: Homebrew is your best friend here. Just run brew install portaudio in your terminal first. Once that's done, pip install PyAudio should work without a hitch.
On Linux (Debian/Ubuntu): You can pull in the necessary packages with your system's package manager. Run sudo apt-get install portaudio19-dev python3-pyaudio before trying the pip install again.
By taking a few moments to get this setup right, you’re building a stable foundation. Now you're all set to dive into the fun part—building your speech recognition app—without having to worry about broken dependencies later on.
Alright, we’ve got our environment set up. Now for the fun part—actually putting Python's speech recognition skills to work. This is where the theory hits the road. We'll tackle the two most common scenarios you'll run into: transcribing a pre-recorded audio file and capturing live speech straight from a microphone.
The basic flow is the same for both. You grab an audio source, listen to it, and then hand it off to a recognition engine to figure out what was said. Once you get this down, you can build almost any speech-to-text feature you can think of. Many of these foundational ideas also pop up in related fields like video transcription, where the same core challenges of audio processing apply.
Let's start simple. You have an audio file sitting on your computer—maybe a meeting recording, a podcast clip, or a voicemail—and you need a text version of it. This is probably the most common use case out there. While the SpeechRecognition library is flexible, you'll have the easiest time with .wav files.
Imagine you have a file named meeting_audio.wav in your project folder. The cleanest way to handle this is by using the AudioFile class as a context manager (with the with statement). This is great practice because it automatically handles opening and closing the file for you.
Here's a quick and dirty script to get it done:
import speech_recognition as sr
r = sr.Recognizer()
audio_file = "meeting_audio.wav"
with sr.AudioFile(audio_file) as source:
# The recognizer reads the whole file
audio_data = r.record(source)
try:
    # We'll use Google's free API for this
    text = r.recognize_google(audio_data)
    print("Transcription: " + text)
except sr.UnknownValueError:
    # This error means the API couldn't understand the audio
    print("Google's API was unable to understand the audio.")
except sr.RequestError as e:
    # This indicates a network or API issue
    print(f"Could not get results from Google's API; {e}")
This little script loads the entire audio file into memory and ships it off to Google's API. The try...except block is non-negotiable; you have to plan for things to go wrong, whether it's mumbling in the audio or your internet connection dropping out.
Now for something more dynamic: transcribing what a user is saying in real-time. This is the foundation for building voice assistants, dictation software, or any interactive voice-controlled app. We'll swap AudioFile for the Microphone class, which hooks into your system’s mic using the PyAudio library we installed earlier.
The biggest headache with live audio is background noise. A fan, a passing car, or even your computer's own hum can throw off the transcription. The trick is to give the script a second to listen to the room before it starts listening for your voice. The library has a handy built-in for this: adjust_for_ambient_noise().
My Two Cents: Don't skip the ambient noise adjustment. Seriously. Taking just one second to calibrate can make a world of difference. It's often the single change that takes your script from "unintelligible garbage" to "surprisingly accurate," especially in a typical home or office setting.
Let's see how to put it all together to capture your voice:
import speech_recognition as sr
r = sr.Recognizer()
with sr.Microphone() as source:
print("Calibrating for ambient noise, please be quiet...")
# Give it a second to listen and set its energy threshold
r.adjust_for_ambient_noise(source, duration=1)
print("Okay, you can speak now!")
# Now, it listens for your actual command
audio_data = r.listen(source)

try:
    # Time to recognize the speech
    text = r.recognize_google(audio_data)
    print("I think you said: " + text)
except sr.UnknownValueError:
    print("Sorry, I didn't catch that.")
except sr.RequestError as e:
    print(f"There was an API error; {e}")
When you run this, it'll tell you to speak, capture what you say, and print its best guess to the screen. With these two examples under your belt, you've got a solid foundation for just about any speech recognition task you can throw at Python.
The SpeechRecognition library is more of a Swiss Army knife than a single tool. Think of it as a universal remote for a bunch of different speech recognition engines. The library itself doesn't do the heavy lifting of transcription; it smartly hands off your audio to a backend service that does. This is a critical point because the engine you pick will fundamentally define your app's performance, accuracy, and cost.
So, how do you choose? It all comes down to what you're building. Are you just tinkering with a personal project where a few mistakes are no big deal? Or are you building a commercial product that needs to be rock-solid and accurate? Do you need it to work on a device with no internet? Answering these questions first will save you a ton of headaches later.
If you're just starting out or building a quick prototype, you don't need to pull out your credit card. The library gives you a couple of fantastic, free options to get going immediately.
recognize_google() (Google Web Speech API): This is the go-to for most beginners, and for good reason. It's surprisingly accurate for a free service and handles many languages right out of the box. The catch? It’s not meant for heavy, commercial use. If you start hammering it with too many requests, you'll hit a rate limit and get blocked. It's perfect for learning, not for scaling.
recognize_whisper() (OpenAI's Whisper): Whisper is a game-changer, offering truly state-of-the-art accuracy. You can run it locally, which is great for privacy, but be warned: the more powerful models demand some serious hardware, especially a good GPU. If you don't have the horsepower, it can be slow.
This flowchart can help you visualize the decision-making process. The very first question is always about connectivity.
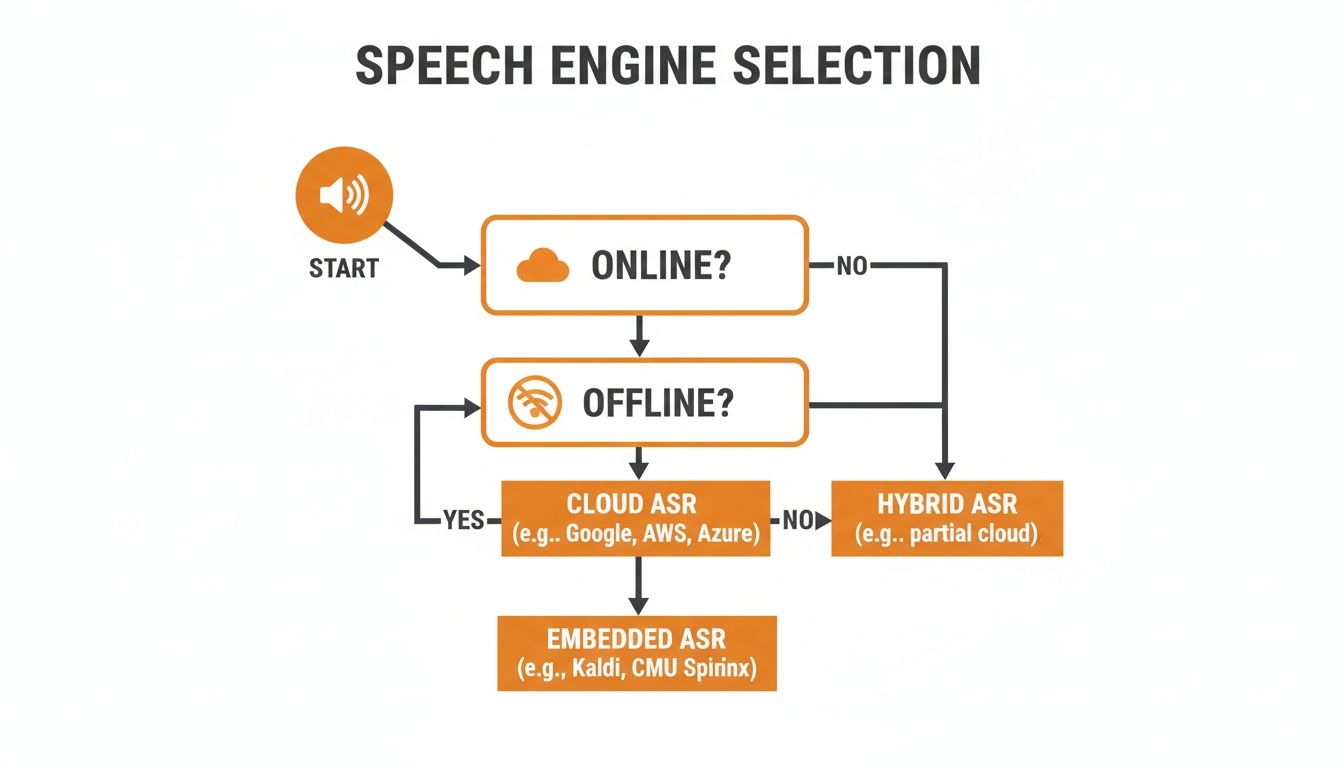
As you can see, whether you need an online or offline solution is the first major fork in the road, dramatically changing your available options.
Once your project moves beyond the hobby stage, you'll need something more robust. This is where you either go fully offline for privacy or turn to a commercial-grade cloud API for maximum performance.
A popular offline choice is recognize_sphinx() (CMU Sphinx). Its biggest selling point is that it runs completely on your device. No data ever leaves the machine, which is a huge plus for privacy-sensitive applications or products that need to function without an internet connection. The trade-off is that its accuracy just can't compete with modern cloud APIs, and it can be a bit tricky to configure properly.
For anything that needs top-tier accuracy and reliability, a premium API is the only real answer. The North American market alone accounts for a massive 34.6% of the global voice recognition industry, a figure largely driven by the powerful cloud services from tech giants. If you're curious, you can read more about these market dynamics to see where the industry is heading.
My Two Cents: Don't even think about launching a serious product on a free API. The leap in accuracy and dependability when you move to a paid service like Google Cloud Speech-to-Text, Azure Speech, or a competitive alternative like Lemonfox.ai is night and day. It's one of the most direct ways to improve your user experience.
Services like Lemonfox.ai are really shaking things up. They deliver accuracy that competes with the big players but at a price point that's far more accessible, with transcription costs under $0.17 per hour. This opens the door for startups and indie developers to build high-quality speech features without a massive budget.
To make the choice clearer, I've put together a table comparing some of the most popular engines you can use with the SpeechRecognition library. Think of this as a quick reference guide to match an engine to your project's needs.
| Engine / API | Primary Use Case | Cost Model | Key Advantage |
|---|---|---|---|
recognize_google() |
Prototyping, small personal projects | Free (with limits) | Easy to use, no API key needed |
recognize_whisper() |
High-accuracy offline transcription | Free (local hardware cost) | State-of-the-art accuracy, runs locally |
recognize_sphinx() |
Offline, privacy-focused apps | Free (open-source) | Works without internet, high privacy |
| Google Cloud, Azure, AWS | Production-scale applications | Pay-as-you-go | High accuracy, scalable, extra features |
| Lemonfox.ai | High-quality, cost-effective apps | Pay-as-you-go | Top-tier accuracy at a much lower cost |
Ultimately, the "best" engine is the one that best fits your specific constraints—be it budget, accuracy requirements, or the need for offline functionality. It often makes sense to start with a free option and upgrade to a premium API as your project matures.
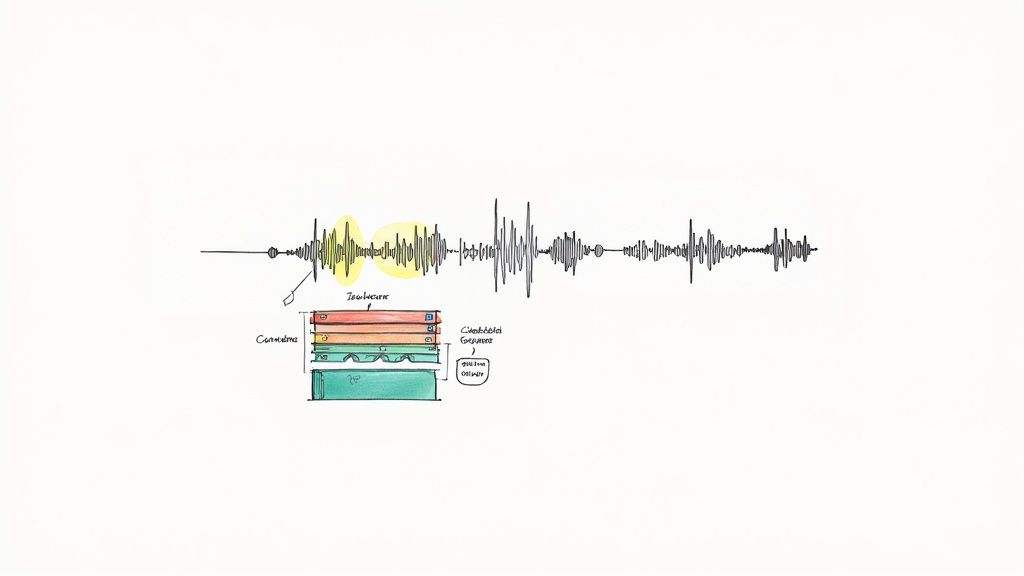
The biggest leap you'll make in speech recognition isn't about code complexity; it's about moving from clean, single-speaker audio files to the messy, unpredictable nature of real-world sound. The pristine examples in tutorials are great for learning, but they rarely prepare you for what's coming: meetings with overlapping conversations, customer calls with dogs barking in the background, or speakers with heavy accents.
Tackling these challenges head-on is what separates a fragile script from a truly robust application. Success really hinges on preparing for this messiness from the get-go. Your code needs to be smart enough to handle ambiguity, network hiccups, and diverse linguistic styles. Building in this resilience from the start will save you countless hours of debugging later.
One of the first hurdles you'll hit is accurately transcribing speech from a global audience. An engine optimized for American English will almost certainly stumble when faced with a Scottish or Australian accent, leading to a frustratingly high word error rate.
Thankfully, the solution is usually straightforward: be explicit. Most quality speech recognition APIs let you specify a language code. This simple parameter provides critical context that can dramatically improve accuracy. For example, instead of a generic API call, you would specify a locale like 'en-AU' for Australian English or 'es-MX' for Mexican Spanish.
A few tips from the field:
I once spent a whole day troubleshooting terrible transcription quality for a client's UK-based audio, only to realize the API was defaulting to US English. It's a classic rookie mistake, but it happens. A one-line fix to specify the language code boosted the accuracy by over 30%.
When your audio has more than one person speaking, a simple transcription often isn't enough. You need to know who said what. This process is called speaker diarization, and it’s a feature you'll find in more advanced speech-to-text APIs.
Diarization works by analyzing the unique vocal patterns of each person to segment the conversation. The result is a transcript where each utterance is tagged with a label, like Speaker 0 or Speaker 1. This is absolutely essential for things like analyzing customer service calls, creating accurate meeting minutes, or transcribing interviews. While the base SpeechRecognition library doesn't handle this out of the box, you can tap into this functionality through a provider's dedicated SDK.
Let's be realistic: your code will eventually run into audio it can't understand or moments when an API call fails. A professional application anticipates these problems and handles them gracefully instead of just crashing.
The SpeechRecognition library raises specific exceptions that you should always wrap in a try...except block. Pay close attention to these two:
sr.UnknownValueError: This pops up when the recognition engine just can't make sense of the audio. Your code should catch this and let the user know their speech was unclear.sr.RequestError: This one happens if there's an issue connecting to the API—think network problems or an invalid API key. Here, you should log the error and maybe suggest the user try again in a moment.By handling these exceptions, you create a much smoother user experience. An app that says, "Sorry, I didn't catch that," is infinitely better than one that just freezes up. This level of polish is what makes a project feel truly complete.
When you first start working with speech recognition in Python, a few questions tend to pop up again and again. Let's tackle some of the most common ones I've run into, so you can sidestep the usual hurdles and get back to building.
Getting better transcriptions isn't about one magic fix; it's a few key adjustments working together. The absolute biggest impact comes from your source audio. Clear, crisp sound from a decent microphone with minimal background noise will always outperform a muffled recording, no matter how good your API is.
The engine you're using is the next piece of the puzzle. While free tools are great for a quick test, they just can't compete with dedicated services. A premium API like Google Cloud Speech-to-Text or a more budget-friendly option like Lemonfox.ai will give you a noticeable jump in quality right away.
One simple trick that people often overlook is providing context. Don't just let the API guess the language. Telling it specifically to listen for 'en-GB' (British English) instead of a generic 'en' can make a huge difference, especially with accents and regional phrasing.
Yes, it absolutely can. This is a big deal for applications where you can't rely on an internet connection or need to keep sensitive audio data completely private.
The most common way to do this is with an engine like CMU Sphinx, which you can call using the recognize_sphinx() function from the SpeechRecognition library.
Keep in mind: Going offline is a trade-off. You gain privacy and independence, but you'll almost always see a drop in accuracy compared to cloud-based APIs. The language support is also more limited, and the setup is a bit more involved, as you'll need to download and manage the language models yourself.
This is the classic "it depends" answer, but for good reason. The best tool really hinges on what you're trying to accomplish.
For getting started or building a prototype, the SpeechRecognition library is fantastic. It acts as a wrapper, giving you a single, simple interface to test out multiple different engines. It's the perfect sandbox for experimenting.
For a production-level application, you'll want to go directly to the source. Using the official SDK from your chosen provider (like Google, AWS, or Lemonfox) will give you full access to all their advanced features, better performance, and more fine-grained control. Wrapper libraries are convenient but sometimes can't expose every single option an API offers.
Ready to build with production-grade accuracy without breaking the bank? Lemonfox.ai offers a powerful Speech-to-Text API that delivers top-tier results at a fraction of the cost, making it the perfect choice for scaling your projects. Start transcribing for under $0.17 per hour.