First month for free!
Get started
Published 11/6/2025
Let's be real—nothing tanks a great piece of content faster than bad audio. That constant background hum, the rumble of street traffic, or the whir of a computer fan can instantly make your podcast or video feel amateurish. It’s the kind of thing that makes people click away.
Thankfully, a dedicated remove noise plugin is the single most powerful tool you can have in your arsenal for getting that clean, studio-quality sound.
In an era of remote work, online courses, and a never-ending stream of content, clear audio has gone from a "nice-to-have" to a "must-have." We've all been there, straining to understand someone through a wall of static on a conference call or podcast. It’s a universally frustrating experience.
This isn't just a hunch; it's a massive driver of innovation. The global market for background noise reduction software was valued at around $2.5 billion in 2025 and is expected to rocket to an estimated $8 billion by 2033. This growth is a direct response to the problems creators and professionals deal with every single day. If you want to dig deeper, you can explore more data on this audio tech boom, which really drives home how vital clear sound has become.
The takeaway is simple: your audience has high expectations.
Listeners and viewers today are savvier than ever. When they encounter poor audio, they don't just hear noise; they perceive a lack of professionalism and care. Here's what's really at stake:
A remove noise plugin does more than just clean up a track—it shows you respect your audience's time and attention. It’s that final coat of polish that distinguishes amateur work from a professional production.
Before we dive into the nuts and bolts, it's helpful to see how these plugins tackle the real-world problems you're actually facing.
We've all run into frustrating audio issues that seem impossible to fix. Here’s a quick look at some common scenarios and how a simple noise removal tool provides the perfect solution.
| Common Noise Problem | Example Scenario | How a Plugin Helps |
|---|---|---|
| Persistent Hum or Buzz | Your microphone picks up the low-frequency hum from an air conditioner, refrigerator, or computer fan. | The plugin identifies this constant, unwanted frequency and surgically removes it without affecting the speaker's voice. |
| Environmental Distractions | You're recording an interview, and a siren wails by outside, or a dog starts barking next door. | Advanced plugins can isolate and suppress these sudden, non-stationary noises, saving an otherwise perfect take. |
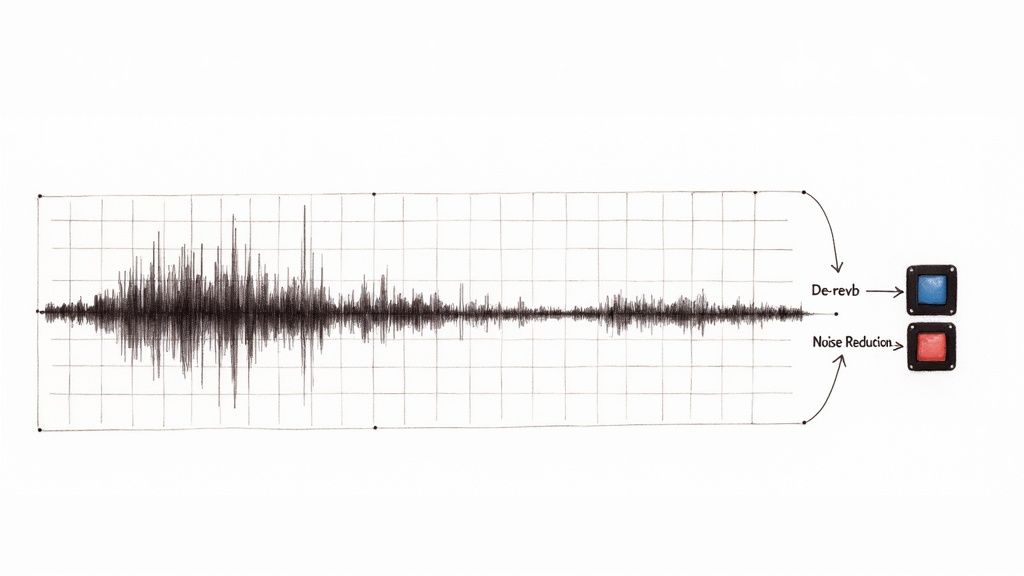
| Room Echo and Reverb | You're recording in a room with bare walls and hard floors, causing your voice to sound distant and echoey. | Many modern tools include a "de-reverb" function that tightens up the sound, making it feel like you recorded in a treated studio. |
| Hiss and Static | Your recording has a high-frequency "ssss" sound, often caused by the recording equipment's own electronic noise floor. | The plugin can easily filter out this "tape hiss" or static, resulting in a much cleaner, more pleasant listening experience. |

As you can see, what used to require complex engineering or a costly re-shoot can now be handled with a few clicks.
This guide will skip the overly technical jargon and give you a practical, hands-on walkthrough. Think of it as your roadmap for rescuing your recordings and making every track sound like it came from a pro studio. Let's get started.
Finding the perfect noise reduction plugin isn't about crowning one tool as "the best." It's about finding the right tool for the job you need to get done. The market for these plugins is exploding for a reason—everyone from podcasters to streamers needs clean audio. In fact, the global background noise reduction market was pegged at $2.31 billion in 2025 and is expected to rocket to $45.02 billion by 2034. That growth is fueled by creators like us.
With a sea of options out there, knowing the key differences will save you a ton of headaches (and money). To get a sense of where things are headed, you can read up on the trends shaping this growing market.
The first big question you need to answer is whether you need to clean up audio live or after the fact.
Next, you have to decide on your preferred working style. Are you looking for a quick, "one-click" fix, or do you want to roll up your sleeves and get your hands dirty with the technical details?
An AI-powered plugin is your best friend when you're on a deadline. These tools use some seriously smart algorithms to figure out what's a voice and what's a noisy fan in the background. You just drop it on your track, maybe adjust a single knob, and let the machine do the heavy lifting. It's a lifesaver for anyone who doesn't want to get bogged down in technical settings.
On the other hand, a manual or spectral editor puts you firmly in control. These plugins let you see the noise frequencies and remove them with surgical precision. Got a nasty 60Hz hum from a refrigerator? You can visually pinpoint that exact frequency and cut it out without ever touching the warmth of the speaker's voice. This takes a bit more know-how, but the level of precision you get is unmatched for tackling really tricky audio problems.
The right tool really depends on the project. If I’m cleaning up a corporate webinar that needs a quick turnaround, I’m reaching for an AI tool every time. But if I’m trying to salvage a crucial, one-of-a-kind podcast interview plagued with noise, a manual editor gives me the power to save it.
When you're comparing plugins, look past the big "noise reduction" dial. The little features are often what separate a good tool from a great one.
Here are a few game-changers to keep an eye on:
In the end, your choice will come down to your budget, how comfortable you are with technical tools, and what your projects demand. The best way to start is by figuring out your main use case—live or post-production—and then deciding whether you value the speed of AI or the precision of manual control.
Alright, let's get to the good part—taking a noisy, distracting recording and making it sound clean and professional. Using a remove noise plugin isn't some one-click magic trick. It's more of an art, really, that involves careful listening and a few key adjustments.
I’ll walk you through a classic, real-world scenario. Imagine you just finished a great interview, but you didn't realize the air conditioner was humming in the background the whole time. That constant, low drone is the perfect candidate for a noise reduction tool.
The entire process boils down to one crucial first step: capturing a noise print. This is just a short, clean sample of only the background noise you're trying to get rid of.
Think of a noise print like a sonic fingerprint. You're basically telling the plugin, "Hey, this is the exact sound I need you to hunt down and remove from the rest of the file." The quality of this little sample is everything; it directly determines how good your final audio will sound.
So, how do you get a good one? Scour your recording for a few seconds where nobody is talking. All you should hear is the room's ambient sound—that AC hum, a computer fan whirring, or maybe some electrical hiss. Highlight that small section and tell your plugin to "learn" the noise from it.
A clean noise print is your most valuable asset. If your sample has even a tiny bit of speech or some other random sound, the plugin will get confused. It might start chopping out parts of the voice you want to keep. Always give your sample a listen first to make sure it's pure background noise.
Once the plugin has its marching orders from the noise print, you can move on to the next step. This involves tweaking two main controls you'll find on almost any remove noise plugin out there.
This is where your ears really come into play. You'll be playing a balancing act between two settings to get rid of the hum without making the main audio sound weird and "watery"—an ugly effect that audio folks call an artifact.
The trick is to make small, incremental changes. Find a section where someone is speaking, put it on a loop, and tweak the threshold and reduction as it plays. You're looking for that sweet spot where the AC is gone, but the speaker’s voice still sounds rich and natural.
This infographic lays out the basic thought process when you're just getting your feet wet.

This just breaks down the workflow into figuring out what you need, looking at your tools, and making a solid choice.
Honestly, getting amazing results often comes down to your process and how you listen. After cleaning up countless audio files, I've learned a few things that make a huge difference.
If you focus on grabbing a great noise print and then make careful, deliberate adjustments, you can turn even the most problematic recordings into polished audio that’s ready for your audience.
Sometimes, the standard noise reduction pass just doesn’t get you all the way there. You’ve managed to kill the steady air conditioner hum, but the recording is still peppered with random, distracting sounds that can ruin an otherwise great take. This is when you need to break out the bigger guns.
When you're fighting against sudden, isolated noises—a dog barking, a door slamming, a loud cough—your typical remove noise plugin is out of its depth. Those tools are designed to learn a consistent noise profile and subtract it. They simply can't handle random, unpredictable interruptions. For these trickier cases, you need a more surgical approach.
This is where spectral repair comes in, and it's a game-changer. Think of it like Photoshop, but for audio. Specialized tools, often found in high-end audio repair suites, generate a spectrogram—a visual map of your sound. On this graph, you can literally see the dog bark as a distinct visual artifact. You can then use tools to "paint" it out, leaving the dialogue around it completely untouched. It’s an incredibly powerful way to fix problems that once seemed baked into the recording forever.
Another common headache is dealing with too much room echo, or reverb. If you've ever recorded in a room with bare walls and hardwood floors, you know that hollow, cavernous sound all too well. While it isn't "noise" in the traditional sense, it can crush the clarity of your audio and make it sound amateurish.
A standard noise reduction tool won't help you here. What you need is a dedicated de-reverb plugin. This type of tool is smart enough to identify the sonic signature of the room's reflections and pull them back, giving you a tighter, more direct sound. It can honestly make a recording sound like it was captured in a treated studio instead of a tile bathroom.
My go-to workflow for echoey audio is to always apply de-reverb before any other noise reduction. Cleaning up the room reflections first gives the main noise reduction plugin a much cleaner signal to analyze, which almost always leads to a more natural and artifact-free result.
For the most challenging audio, one plugin is rarely the answer. The real secret to a professional-sounding fix is often stacking multiple plugins, with each one assigned a very specific task. This layered strategy is far more effective and sounds much cleaner than just cranking the settings on a single tool.
The market for these specialized tools is huge—valued at around $456.7 million globally in 2024 for music and audio engineering. That figure alone shows you how essential these plugins are for getting clean audio. Many modern tools now use AI to make features like spectral repair more precise than ever. You can dive deeper into the growth of the noise reduction plugin market to see how this tech is evolving.
Here’s what a practical plugin chain might look like for a really messy recording:
By assigning each problem to a specialized tool, you get a much cleaner result with fewer weird digital artifacts. This approach gives you the power to rescue audio you might have previously written off as unusable, turning problematic recordings into polished, professional-sounding tracks.
https://www.youtube.com/embed/lpqbqel-W3w
It’s surprisingly easy to make your audio sound worse with a noise reduction plugin. I’ve seen it happen countless times. These are powerful tools, but they need a delicate touch. The single biggest mistake I see people make is pushing them way too hard.
Remember, the goal is to gently pull back distracting noise, not to scrub the audio until it's sterile and lifeless.
The quickest way to ruin a good recording is by over-processing it. When you crank the noise reduction settings to the max, you're not just removing the hiss or hum—you're introducing strange, watery sounds that are often far more distracting than the original problem.
In the audio world, we call these distortions artifacts. To a trained ear, they scream "amateur processing." Your real mission is to make the background noise disappear without letting the listener know you did anything at all. It's a subtle art.
Push a noise removal plugin to its limits, and it starts to get confused. It can no longer perfectly distinguish between the "noise print" you gave it and the complex, similar frequencies within the human voice. What does it do? It starts chipping away at the voice itself.
This is what creates that dreaded "phasey" or robotic quality. You’ll hear a weird, swirling, underwater-like sound that follows the dialogue. Once you learn to recognize this artifact, you'll start hearing it everywhere in poorly edited videos and podcasts.
The best noise reduction is the kind you never notice. If your audio sounds “processed,” you’ve gone too far. Aim for transparency, where the background noise simply vanishes, leaving the voice sounding completely natural and untouched.
Another common error happens right at the start: grabbing a bad noise sample. Think of the "noise print" as the reference photo you give the plugin. If the photo is blurry or has other people in it, the plugin is going to do a terrible job.
Here are the usual suspects when it comes to bad noise prints:
My advice? Always listen to your selected noise sample with headphones before you tell the plugin to learn it. Make sure it’s nothing but the consistent background hum you want to get rid of.
Finally, one of the most critical mistakes is simply failing to compare your work. Your ears adjust quickly to what they're hearing, and you can easily lose perspective. Always use the plugin’s bypass button or an A/B toggle to switch between the original and the processed audio. This simple reality check instantly reveals if you’ve actually improved the track or just introduced new problems. It keeps your adjustments honest.
When you're first getting your hands dirty with a noise removal plugin, a few questions always seem to come up. It's totally normal. Getting these sorted out is the key to moving from a bit of guesswork to feeling confident every time you hit "apply."
Let's walk through some of the most common hurdles I see people run into.
Honestly, these tools can work wonders, but they aren't miracle workers. A good plugin is brilliant at stripping out consistent, steady background noise—think of things like air conditioner hum, the hiss from an old preamp, or a computer fan droning on.
Where they hit their limit is with fundamental recording flaws. Certain issues just can't be fixed in post-production.
My advice? Always think of a plugin as a powerful cleanup tool, not an audio resurrection machine. Your best bet is always to get the cleanest recording you can from the start.
This one really boils down to your specific needs and workflow.
A real-time noise removal plugin works its magic on the fly. This is essential for things like live streams, video calls, or online meetings where you need the audio cleaned up as it's happening. The trade-off is that they prioritize speed over absolute perfection.
On the other hand, a post-production plugin is designed to work on an audio file after you’ve finished recording. This approach gives you a massive amount of control and precision, letting you fine-tune the settings for the best possible result. It's the standard for podcasts, video editing, and any professional audio work where quality is king.
Bottom line: If it's live, you need real-time. For anything you're editing and publishing later, post-production tools will always deliver a more polished, professional sound.
Not necessarily, especially when you're starting out. Many digital audio workstations, and even free editors like Audacity, come with surprisingly capable built-in noise reduction tools. These are fantastic for handling common problems and are the perfect way to learn the ropes without spending a dime.
So when should you upgrade? Paid plugins typically bring more advanced algorithms to the table, often powered by AI. This usually means fewer weird-sounding artifacts and more specialized tools for tricky problems like removing echo (de-reverb) or mouth clicks (de-click).
Start with what you have. You'll know it's time to upgrade when you start hitting the limits of the free tools and your projects demand that extra layer of polish.
Once your audio is crystal clear, you'll probably need to transcribe it. For that, Lemonfox.ai offers a blazing-fast and highly accurate Speech-To-Text API. It's a great, developer-friendly option for converting your clean audio files into text, with support for over 100 languages. Start transcribing with Lemonfox.ai.