First month for free!
Get started
Published 12/10/2025

When you need to transcript an audio file to text, the go-to solution for developers today is a powerful API. These services can turn spoken words into clean, machine-readable data with impressive accuracy, making it a foundational piece for building smart, modern applications. It's quickly moved from a "nice-to-have" feature to a core requirement for everything from accessibility to data analysis.
The ability to programmatically convert speech to text isn't a sci-fi concept anymore; it's a practical and essential skill for developers. What used to be a monstrously complex and resource-heavy task is now handled with a few simple API calls, unlocking real business value across dozens of industries. This shift puts developers right at the center of creating smarter, more accessible, and data-rich software.
The demand isn't just a hunch. The global speech-to-text API market hit around USD 3.8 billion in 2024 and is expected to blow past USD 8.5 billion by 2030. This explosion is driven by everyone carrying a microphone in their pocket and a growing mandate for accessible technology. You can dig into the numbers yourself over at The Business Research Company. For us as developers, that trend is a massive green flag—it's a clear signal to build features that meet this demand head-on.
Before we get into the code, it's worth taking a moment to see where this technology really shines. Developers are integrating transcription into a surprising range of applications to solve some genuinely tough problems.
Here’s a look at some of the most common applications I've seen in the field.
| Application Area | Primary Benefit | Example Scenario |
|---|---|---|
| Customer Support Analytics | Unlocking business intelligence | Transcribing support calls to run sentiment analysis, spot recurring product issues, and flag conversations needing a manager's attention. |
| Content Accessibility | Reaching a wider audience | Automatically generating captions and subtitles for videos and webinars to comply with standards like WCAG. |
| Media & Content Creation | Speeding up workflows | Providing journalists and podcasters with rough transcripts to quickly find key quotes and edit content faster. |
| Meeting & Productivity Tools | Creating searchable records | Transcribing virtual meetings so team members can search for action items or decisions without re-watching the entire recording. |
Ultimately, automated transcription is the engine behind countless high-value features. Don't just think of it as a technical function; see it as a gateway to unlocking insights that were previously trapped in audio files.
Key Takeaway: Learning how to programmatically transcript an audio file to text is about more than just writing code. It's about knowing how to turn unstructured audio data into structured, actionable information that can drive business decisions and make users' lives easier.
This skill lets you build applications that can listen, understand, and react to the spoken word. From beefing up a media platform to building powerful business intelligence tools, the possibilities are practically endless.
Let’s be honest: the accuracy of any transcription hinges almost entirely on the quality of your source audio. A clean, well-prepared file is the single biggest factor in getting a great result. Think of it as giving the AI a clear signal to work with—garbage in, garbage out is a very real thing here.
Before you even think about hitting that API endpoint, spending just a few minutes on audio prep can slash your error rate. This isn't about becoming a sound engineer overnight. It's about a few simple, powerful steps that give the transcription model the best possible shot.
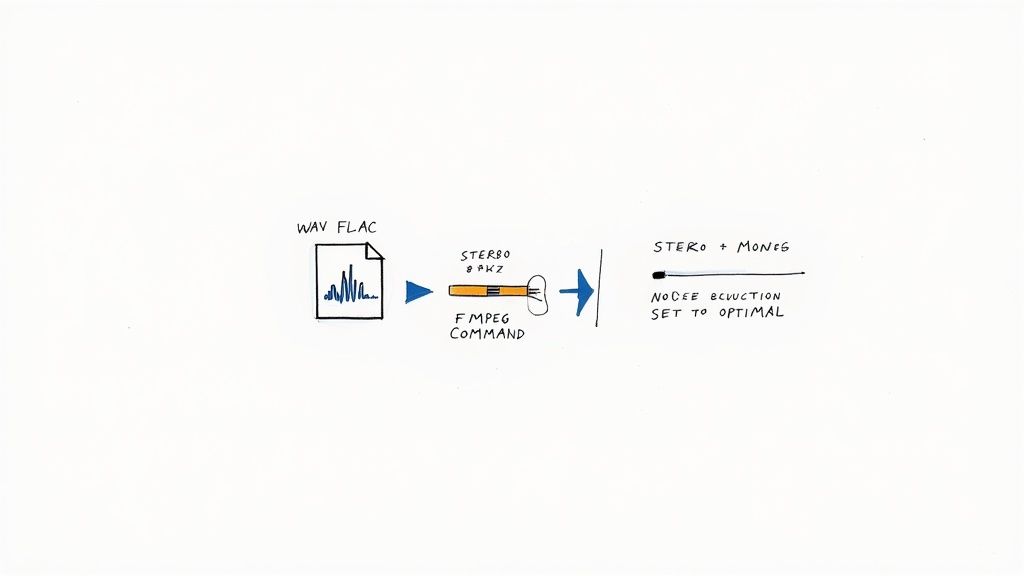
First thing’s first: start with a lossless audio format if you have the choice. We all know MP3s are convenient for their small size, but that compression comes at a cost. It throws away subtle audio data, creating artifacts that can easily trip up a transcription model.
This simple change gives the model way more information to work with. It's especially critical for picking up on quiet speech, industry jargon, or conversations happening in less-than-ideal environments.
Consistency is your friend. Transcription APIs are trained on specific audio characteristics, and they perform best when your files match those standards. The two settings that make the biggest difference are the sample rate and the channel count.
Think of the sample rate as the level of detail captured every second. While you don't need studio-grade rates, going too low will make speech sound muddy and hard to decipher. For voice, 16,000 Hz (16 kHz) is the sweet spot—it delivers excellent clarity without bloating your file size.
Most transcription models also expect single-channel (mono) audio. If you send a stereo file, the model might get confused trying to process two different audio streams at once.
Pro Tip: Always downmix your stereo tracks to mono. This merges the left and right channels into a single stream. It’s a dead-simple step that eliminates a major source of potential confusion for the API and almost always boosts accuracy.
You don't need expensive audio software for this. The free, command-line tool FFmpeg is an absolute workhorse for this kind of audio prep. It’s incredibly powerful and can handle format conversion, channel mixing, and resampling all in one go.
Here's the only command you'll likely need. It takes an input file (we'll use input.mp3 as an example), converts it to a mono WAV, and sets the sample rate to our ideal 16 kHz.
ffmpeg -i input.mp3 -ac 1 -ar 16000 output.wav
Let's quickly break that down:
-i input.mp3: This is your source file.-ac 1: Sets the audio channel count to 1 (mono).-ar 16000: Sets the audio sample rate to 16000 Hz.output.wav: The name of your new, optimized file.By running this one line in your terminal, you’ve knocked out the most common audio issues that tank transcription quality. Taking these few extra moments up front ensures the data you send to the API is perfectly primed for success.
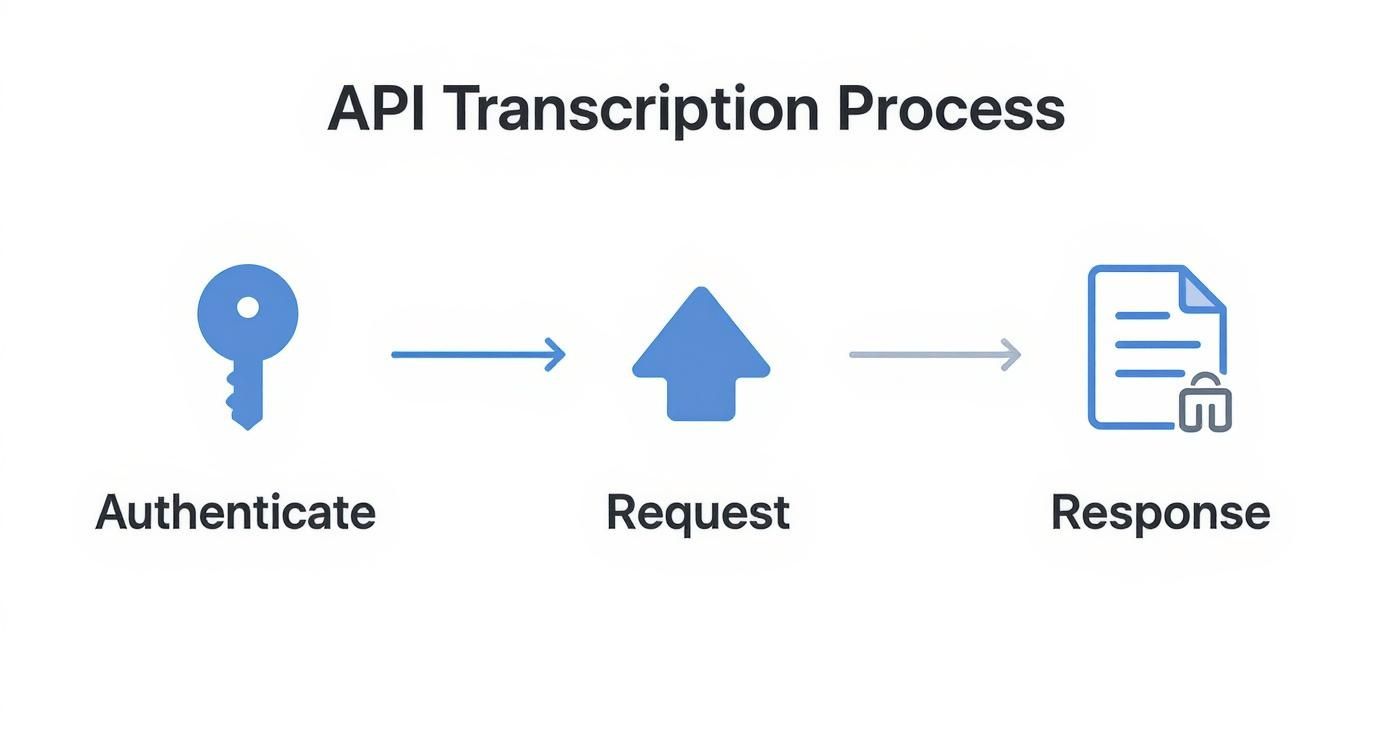
Alright, your audio file is prepped and ready. Now for the fun part: making the API call and seeing the transcription come back. This is where the theory becomes a real, tangible result. We'll use Lemonfox.ai to walk through the entire process, from authenticating the request to parsing the final text.
The whole speech-to-text market is exploding. It was valued at USD 3.08 billion in 2024 and is expected to rocket to USD 36.91 billion by 2035. This isn't just a niche tool; it's becoming a foundational piece of the modern tech stack. You can dig into the details of this market expansion to see what's driving the growth.
First thing's first: authentication. Like any good API, Lemonfox needs to know who you are. This is done with a simple API key that you’ll pass along in your request headers.
To get your audio transcribed, you’ll send a POST request to the API's transcription endpoint. This request is made up of two key parts: the headers (for your API key) and the body (for your audio and settings).
Your headers will look something like this:
Authorization: Bearer YOUR_API_KEY: This is where you slot in your unique API key.Content-Type: multipart/form-data: This just tells the server that you're sending a file along with other bits of data.The request body is where you'll pack the audio file itself, plus any specific instructions for the API.
You could just send the file with default settings, but for the best results, you'll want to fine-tune the request. Think of these parameters as direct instructions for the AI model.
Here are the ones you'll use most often:
'en' for English) is far more reliable, especially for short clips or audio with mixed languages.speaker_recognition to true tells the API to identify and label who said what.json gives you much richer data. You’ll get word-level timestamps and confidence scores—incredibly handy for building subtitles or an interactive media player.By sending these clear instructions, you're not just throwing audio at a black box. You're actively guiding the transcription process to get a more accurate and useful result tailored to your specific needs.
Let's tie this all together. Here’s a quick Python script using the popular requests library to send a local file named optimized_audio.wav to the Lemonfox.ai API.
import requests
api_key = "YOUR_LEMONFOX_API_KEY"
audio_file_path = "optimized_audio.wav"
url = "https://api.lemonfox.ai/v1/audio/transcriptions"
headers = {
"Authorization": f"Bearer {api_key}"
}
with open(audio_file_path, "rb") as audio_file:
files = {
"file": (audio_file_path, audio_file, "audio/wav")
}
data = {
"language": "en",
"speaker_recognition": "true" # Requesting speaker labels
}
response = requests.post(url, headers=headers, files=files, data=data)
if response.status_code == 200:
transcription_data = response.json()
print(transcription_data['text'])
else:
print(f"Error: {response.status_code}")
print(response.text) # Print the error details from the API
This simple script handles the authentication, file upload, and our chosen settings. If everything goes well, you'll get a 200 status code and a JSON response containing your full transcript, ready to use.
Transcribing a quick, one-minute audio clip is one thing. The real test comes when you’re staring down a folder of multi-hour conference recordings or an entire podcast series. A simple, synchronous API call that works perfectly for a tiny file will almost certainly time out and fail when you try to push a two-hour recording through it.
This is where you need to start thinking like an engineer and move from simple requests to a more robust, scalable architecture.
The core issue with large files is time. A direct, synchronous request forces your application to sit and wait, keeping a connection open until the transcription is complete. For any audio longer than a couple of minutes, this is incredibly inefficient and just asking for trouble.
The answer is to work asynchronously. Instead of waiting for the text to come back in the same HTTP response, you send the audio file, and the API instantly replies with a job ID. Your application is now completely free to move on to other tasks.
Once the transcription is finished on the server-side, the API notifies your application by sending the completed text to a URL you've configured beforehand. This notification system is called a webhook. It’s a game-changer for building reliable systems.
This pattern is far more resilient and scalable. It lets you:
This flow is a standard for any serious API work. You authenticate, send the request, and get a response.
Whether you choose a synchronous or asynchronous approach depends entirely on your use case, from file size to user expectations.
To help you decide, here’s a quick breakdown of the two primary methods for API-based transcription. Choosing the right one is crucial for building an efficient and user-friendly application.
| Attribute | Synchronous API Call | Asynchronous API Call (with Webhooks) |
|---|---|---|
| Best For | Short audio clips (under 60-90 seconds) | Long-form audio (podcasts, meetings, lectures) |
| Connection | Stays open, waiting for the full response | Closes immediately after the job is accepted |
| Response Time | Immediate (for short files) | Delayed; notification sent upon completion |
| Scalability | Poor; ties up server resources | Excellent; ideal for batch processing & high volume |
| Error Handling | Simple; single point of failure (timeout) | More complex but robust; handles transient errors |
| User Experience | Can lead to long waits and frozen UIs | Better; users can do other things while it processes |
For any application that needs to handle audio of unpredictable length or process multiple files, the asynchronous webhook model is almost always the superior choice.
So what do you do when you have a backlog of hundreds, or even thousands, of audio files to get through? Sending them one by one is a recipe for a slow, inefficient pipeline. This is the perfect job for batch processing. The idea is to create a queue of transcription jobs and process them in parallel to really crank up the throughput.
You can build a simple but powerful queuing system using a service like Redis or RabbitMQ. Your main application just adds file paths or URLs to the queue. Then, a separate pool of worker processes pulls jobs from that queue and fires off requests to the transcription API. This gives you fine-grained control over concurrency, letting you maintain, say, 10-15 parallel requests at a time to maximize speed without hitting API rate limits.
A hard-earned tip: When you design a batch system, make robust error handling a top priority. If one transcription job fails, it absolutely should not bring the entire batch to a halt. The right way to handle it is to log the error, move the failed job to a separate "dead-letter" queue for later inspection, and let the workers continue processing the rest.
As your transcription volume grows, cost and speed quickly become the two most important metrics. The pricing model of your API provider will directly impact your bottom line. Most services charge by the minute, and those minutes can add up incredibly fast.
Look for services that are built for scale. For example, Lemonfox.ai offers rates below $0.17 per hour, which makes large-scale transcription projects financially realistic.
For applications that need faster turnaround, like generating captions for recently uploaded videos, latency is just as critical as cost. When you're evaluating a service, always check its performance benchmarks. Consider providers with geographically distributed infrastructure, like Lemonfox.ai’s EU-based API, to minimize network latency for your users in that region.
Getting a block of text back from an API is a solid start, but the real magic happens when you turn that raw data into something genuinely useful for your users. This is where you go from a simple transcript audio file to text function to a polished, interactive feature.
The demand for this is exploding, particularly on mobile. The voice-to-text market on mobile is on track to grow from USD 22.2 billion in 2025 to a massive USD 183.5 billion by 2035. That's not just a trend; it's a clear signal that users want and expect voice-integrated features in their apps. For a deeper dive into these numbers, check out the report from Future Market Insights.
When you ask a good transcription API for a JSON response, you get a treasure trove of structured data—not just the words. You get word-level timestamps, speaker labels, and confidence scores. This is the raw material for building some truly powerful features.
For example, you can use those timestamps to build an interactive transcript. Picture a user listening to a lecture or podcast in your app. As the audio plays, you can highlight the exact word being spoken in real-time. Better yet, let them click any word in the transcript to jump right to that moment in the audio. It's a huge accessibility and usability win.
And if you used speaker diarization? The JSON will tell you exactly who said what. A little bit of parsing is all it takes to format the transcript like a script, with clear speaker labels, making conversations much easier to follow.
Generating subtitles is another perfect use case for this detailed data. Manually creating SRT files (the standard for subtitles) is a tedious chore, but with a good JSON response, you can automate the whole thing.
An SRT file is just a series of numbered blocks, each containing:
00:01:23,456 --> 00:01:25,789You can write a simple script to loop through the transcript's segments. For each one, you grab the start time of the first word and the end time of the last word, and boom—you have a perfectly timed subtitle block.
Key Insight: The rich metadata in a JSON response is what elevates a transcript from a static text file to an interactive experience. Use the timestamps and speaker labels to build features that make your content more engaging, searchable, and accessible.
Of course, things don't always go perfectly in the real world. API calls can time out, audio files might be corrupted, or networks can get flaky. Your app needs to handle these hiccups gracefully. If you're using webhooks for asynchronous jobs, it's smart to implement a retry mechanism with exponential backoff for those temporary glitches. For permanent failures, make sure you log the job ID and the error so you can figure out what went wrong.
Data privacy is just as critical. Your users are trusting you with their voice data, which can be incredibly sensitive. It’s on you to choose a provider that takes this seriously. For instance, a service like Lemonfox.ai is built with a privacy-first mindset, deleting all customer data immediately after it’s processed.
If you have users in Europe, GDPR is a big deal. Using an EU-based API—which Lemonfox.ai also offers—keeps the data within the EU. This drastically simplifies your compliance burden and gives your users confidence that their data is being handled correctly.
When you first start transcribing audio files, a few questions always come up. I've seen them countless times. Getting these sorted out early on will save you a ton of headaches and help you build a much more robust system. Let's walk through what developers usually ask.
For the best possible accuracy, you absolutely want to use a lossless format. My go-to recommendations are always FLAC or a linear PCM WAV file.
Why? Because formats like MP3 introduce compression artifacts—tiny distortions that can trip up even the most advanced transcription models. Lossless formats keep the original audio data perfectly intact.
Also, it's good practice to standardize your audio. Aim for a sample rate of at least 16,000 Hz and stick to a single (mono) channel. This combination gives the API the cleanest signal to work with.
This is a big one. The feature you're looking for is called speaker diarization, sometimes referred to as speaker recognition. When you flip this setting on in your API request, the model intelligently analyzes the audio to tell one voice from another.
Instead of a messy block of text, the final transcript will neatly label each part of the conversation, like 'Speaker A' and 'Speaker B'. This is a game-changer for transcribing interviews, team meetings, or any recording with more than one person talking.
Key Takeaway: Speaker diarization is what turns a confusing wall of text into a structured, readable conversation. For any multi-speaker audio, it's a must-have.
Yes, and this is where you can really see a difference. Most modern transcription APIs offer a feature often called "custom vocabulary" or "word boosting."
This lets you feed the model a specific list of words—think unique product names, industry jargon, or company acronyms. The model then prioritizes these terms, which massively boosts the odds of them being transcribed correctly. It's an incredibly powerful tool for domain-specific audio.
Ready to integrate fast, accurate, and affordable transcription into your application? With Lemonfox.ai, you get top-tier performance for less than $0.17 per hour, robust privacy features, and an EU-based API for seamless GDPR compliance. Get started with 30 hours of free transcription at https://www.lemonfox.ai.