First month for free!
Get started
Published 11/10/2025
At its core, transcribing an audio file is simply the art of turning spoken words into written text. This used to be a painstakingly manual process, but now we can use specialized software or an API that relies on artificial intelligence to recognize and write down human speech. The result? Audio content becomes searchable, easy to analyze, and far more accessible.
In a world overflowing with audio data, converting speech to text isn't just a neat feature anymore—it's a critical business function. As a developer, you're likely being asked more and more to build transcription capabilities directly into your applications. This isn't surprising, as businesses are desperate to unlock the massive amounts of unstructured data hiding inside their audio and video files.
Here’s a quick look at the Lemonfox.ai homepage, which offers a powerful Speech-to-Text API built for this exact challenge.

As you can see, the focus is on giving developers a straightforward way to plug powerful transcription features right into their projects, without all the usual headaches.
Think about the last time you had to find a specific comment someone made in a two-hour-long meeting recording. Scrolling back and forth is a huge time-waster. An accurate, automated transcript turns that audio file into a searchable document, making you instantly more productive.
This same benefit applies everywhere:
The market statistics back this up. The global audio transcription software market was valued at around $2.5 billion in 2025 and is expected to grow at a compound annual growth rate (CAGR) of 15% through 2033. This growth is directly tied to the explosion of audio content we're seeing in every sector. If you're curious, you can dig into more market trend data from Archive Market Research.
For a developer, getting comfortable with a tool like the Lemonfox.ai Speech-to-Text API is about more than just adding a feature. It’s about giving your application a real competitive advantage by turning raw audio into actionable intelligence.
This guide is designed to be a hands-on walkthrough. We'll start with the initial setup and work our way through to handling the kind of complex, real-world audio you'll actually encounter on the job.
https://www.youtube.com/embed/C3bOxcILGu4
Before you can make that first API call to get a transcription from an audio file, you’ve got to get your workspace in order. Getting this foundational work done right from the start saves you from a world of headaches later and makes sure your project kicks off on a solid, secure footing. Let’s walk through getting your local environment ready.
First things first, you'll need a Lemonfox.ai account. Once you’re signed in, head over to your dashboard and grab your API key. Think of this key as the password to your new transcription superpower—you’ll want to keep it safe.
Speaking of safety, never, ever hardcode your API key directly into your application. It’s a huge security risk. Instead, the standard practice is to store it as an environment variable. This keeps your credentials out of your source code, so you don't accidentally push them to a public GitHub repository for the whole world to see.
If you’ve worked on multiple Python projects, you know how messy dependencies can get. To sidestep any potential conflicts, we'll create a virtual environment. It’s like a clean, isolated sandbox just for this project’s packages.
Pop open your terminal and run these commands:
python -m venv lemonfox-transcription-envsource lemonfox-transcription-env/bin/activate.\lemonfox-transcription-env\Scripts\activateYou'll know it's working when your command prompt changes to show the environment's name. Now, you can install libraries without messing with your system’s global Python setup. For our purposes, we just need the excellent requests library to talk to the API.
Install it with pip:pip install requests
That’s it. This one package is all you need to handle the HTTP requests for sending your audio and getting back the transcription.
Alright, let's get that API key handled properly. We’re going to set it as an environment variable so your Python script can access it without exposing it.
For your current terminal session, here’s how to set it:
export LEMONFOX_API_KEY='your_api_key_here'set LEMONFOX_API_KEY=your_api_key_here$env:LEMONFOX_API_KEY='your_api_key_here'Pro Tip: To make this permanent, add the command to your shell's startup file (like
.bashrc,.zshrc, or your PowerShell profile). This way, the variable will be ready and waiting every time you open a new terminal, which is a real time-saver.
Properly managing your API keys is crucial for security. A compromised key can lead to unauthorized API usage and unexpected charges on your account. Here's a quick guide to keeping your keys locked down.
A quick reference guide for securely handling and using your API credentials to prevent unauthorized access.
| Practice | Why It Matters | Example Implementation |
|---|---|---|
| Use Environment Variables | Keeps credentials separate from your codebase, preventing accidental exposure in version control systems like Git. | Store your key in a .env file and use a library like python-dotenv to load it in your application. |
| Restrict Key Permissions | Limit a key's access to only the necessary services and actions, following the principle of least privilege. | In your API provider's dashboard, configure the key to only have access to the speech-to-text endpoint. |
| Rotate Keys Regularly | Regularly changing your API keys reduces the window of opportunity for attackers if a key is ever compromised. | Set a calendar reminder to generate a new key and decommission the old one every 90 days. |
| Monitor Usage | Keep an eye on your API usage logs to detect any unusual activity that might indicate a compromised key. | Set up alerts in your provider’s dashboard to notify you of unexpected spikes in API calls. |
Following these practices is a small investment of time that pays off big in protecting your application and data.
And with that, you’ve built a clean, secure, and organized development environment. You’ve got your dependencies managed and your API key locked down, putting you in the perfect spot to make your first successful API call.
Alright, you've got your environment set up and your API key is ready to go. Now for the fun part: turning an audio file into text. This is where all the prep work pays off, and you get to see the API in action. We'll walk through a simple Python script that sends an audio file over to Lemonfox.ai and gets back a clean transcription in just a few moments.
The whole process boils down to sending a standard HTTP POST request. You'll just need to bundle your authentication key and the audio data together. If you've worked with web APIs before, this pattern will feel very familiar.
Let's dive right into a complete, working script. I'm assuming you have an audio file named meeting_audio.wav saved in the same folder and you've already set up your LEMONFOX_API_KEY environment variable as we discussed.
import requests
import os
api_key = os.getenv("LEMONFOX_API_KEY")
api_url = "https://api.lemonfox.ai/v1/audio/transcriptions/"
if not api_key:
raise ValueError("LEMONFOX_API_KEY environment variable not set.")
headers = {
"Authorization": f"Bearer {api_key}"
}
audio_file_path = "meeting_audio.wav"
try:
with open(audio_file_path, "rb") as audio_file:
files = {
"file": (audio_file_path, audio_file, "audio/wav")
}
    # 5. Make the POST request to the API
    response = requests.post(api_url, headers=headers, files=files)

    # 6. Check the response and print out the transcription
    if response.status_code == 200:
        transcription_data = response.json()
        print("Transcription successful!")
        print(transcription_data['text'])
    else:
        print(f"Error: {response.status_code}")
        print(response.text)
except FileNotFoundError:
print(f"Error: The file '{audio_file_path}' was not found.")
except Exception as e:
print(f"An unexpected error occurred: {e}")
This script gives you a solid starting point. It handles authentication, file uploading, and even some basic error checking for things like a missing file.
So, what’s actually happening in that snippet? Let's walk through it.
First, we import the requests library, which is the gold standard for making web requests in Python, and the os library to securely access our API key. We then define the API endpoint and build the Authorization header. It’s important that this header follows the Bearer your_api_key_here format.
Next, we open the audio file. The key detail here is using "rb", which means "read binary." Audio isn't plain text; it's a stream of bytes, and the API needs that raw data to work its magic.
A Quick Tip from Experience: The structure of the
filesdictionary is specific to how therequestslibrary handles file uploads (known as multipart/form-data). It's a tuple containing the filename, the file object itself, and the file's MIME type, like 'audio/wav'. Getting this wrong is a common stumbling block.
Finally, the requests.post() function does the heavy lifting, sending everything to the Lemonfox.ai servers. We immediately check the HTTP status code from the response. If we get a 200 OK, it means we're in business and can parse the JSON to pull out our transcript.
When the API call is successful, you don't just get a wall of text back. You get a well-structured JSON object that's packed with useful data. Here’s a simplified look at what to expect:
{
"status": "completed",
"text": "Hello, this is a test of the transcription service.",
"words": [
{ "word": "Hello,", "start": 0.5, "end": 0.9 },
{ "word": "this", "start": 1.0, "end": 1.2 },
{ "word": "is", "start": 1.2, "end": 1.4 },
{ "word": "a", "start": 1.4, "end": 1.5 },
{ "word": "test", "start": 1.6, "end": 2.0 }
// ... and so on
]
}
The text field gives you the complete, readable transcript. But the real power often comes from the words array. This gives you precise start and end timestamps for every single word. This level of detail is fantastic for building features like clickable transcripts or generating subtitles.
This kind of rich data is becoming essential. The general transcription market in the United States alone was on track to blow past $32 billion by 2025, fueled by massive demand in fields like healthcare and legal services. You can read more about the transcription services market from Ditto Transcripts. That growth really highlights why getting detailed, accurate transcription data is more important than ever.
In an ideal world, we'd only get short, crystal-clear WAV files. But let's be realistic. You're far more likely to be handed a two-hour podcast recording in a compressed MP3 format or a jumble of different file types. To get a reliable transcription from an audio file, you need a strategy for these real-world curveballs.
The Lemonfox.ai API is pretty flexible out of the box, handling common formats like MP3, WAV, M4A, and FLAC without a fuss. But what about that odd WMA or OGG file that lands on your desk?
My go-to solution is to standardize everything before it ever hits the API. A fantastic, open-source tool for this is FFmpeg. With a simple one-line command, you can convert pretty much any audio format into a high-quality WAV, which is perfect for transcription. This little preprocessing step saves a lot of headaches down the line.
This graphic gives you a high-level look at the process.
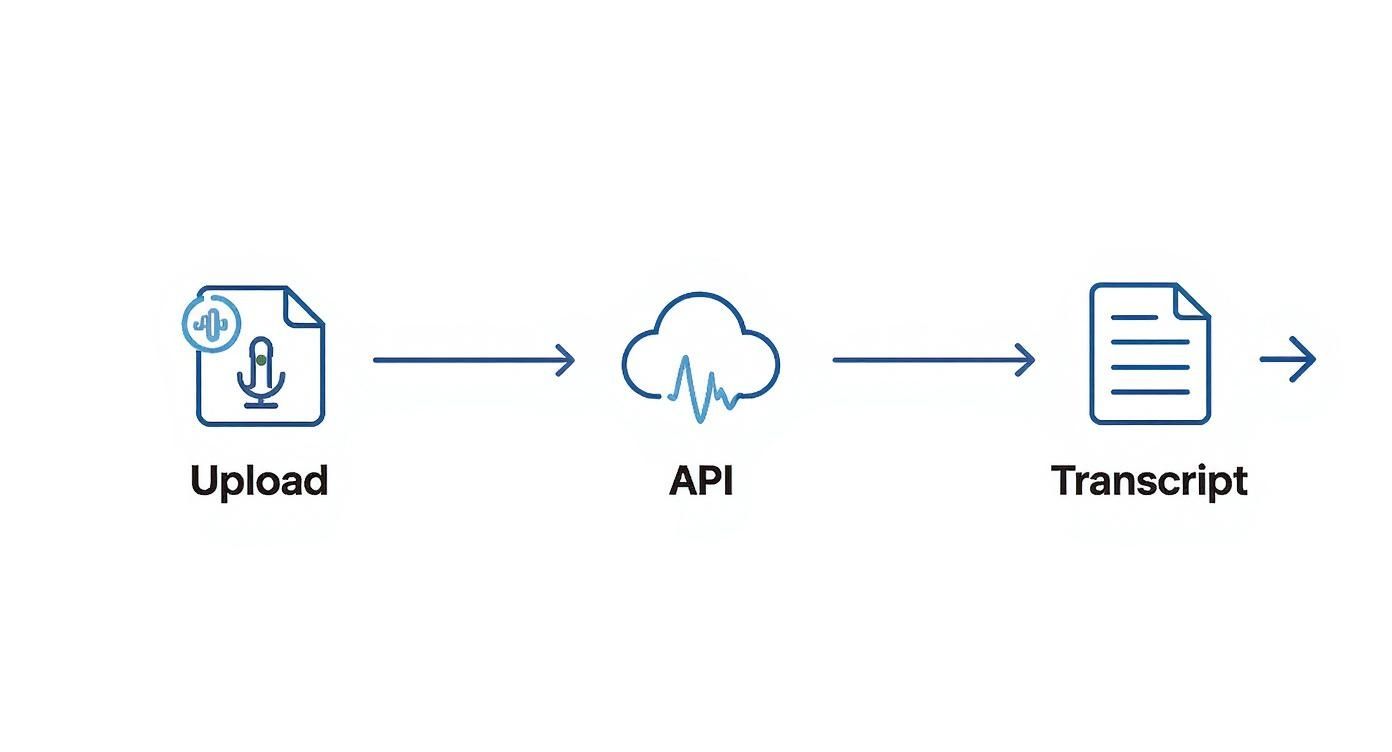
While this flow works great for smaller files, you'll need a smarter approach when dealing with truly massive audio.
Trying to upload a three-hour recording in a single API request is a recipe for disaster. It's inefficient, prone to timeouts, and likely to hit an API size limit. The professional way to handle this is a technique called audio chunking.
The idea is simple: you programmatically slice the large audio file into smaller, more digestible pieces. I usually aim for chunks of about 10-15 minutes. Then, you send each chunk to the API one by one.
As you get the transcribed text back for each piece, you just stitch it all together in the correct sequence. Not only is this method more resilient, but it also opens the door to parallel processing if you want to get the final transcript even faster.
Breaking a large file into smaller, independent jobs makes your system far more robust. If one chunk fails—maybe due to a network blip—you only need to retry that small piece, not the entire multi-gigabyte file.
So, what does this look like in practice? You don't need to build a complex audio editor. A handy Python library like pydub can do all the heavy lifting for you. It makes splitting audio files almost trivial.
Here’s a conceptual Python function to show you how it works:
from pydub import AudioSegment
import math
def split_audio_into_chunks(file_path, chunk_length_ms=600000):
"""Splits an audio file into chunks of a specified length."""
audio = AudioSegment.from_file(file_path)
num_chunks = math.ceil(len(audio) / chunk_length_ms)
for i in range(num_chunks):
    start_ms = i * chunk_length_ms
    end_ms = start_ms + chunk_length_ms
    chunk = audio[start_ms:end_ms]

    chunk_name = f"chunk-{i}.wav"
    chunk.export(chunk_name, format="wav")
    print(f"Exported {chunk_name}")

    # Here, you would add the code to send this chunk to the API
    # transcribe_audio_chunk(chunk_name)
Running this script would turn your massive source file into a neat series of smaller WAV files. From there, your application would just need to loop through them, send each one for transcription, and append the results to a final document. This chunking method is exactly how you handle enterprise-grade transcription jobs where audio files can be several hours long.
A basic transcript gives you the words, but it often misses the most important part: who said them. When you've got more than one person talking, a standard transcription from an audio file can quickly turn into a confusing block of text. This is exactly where speaker diarization comes in, transforming a simple transcript into a genuinely useful, organized record.

So, what is it? Speaker diarization is the technical term for figuring out who spoke when. Instead of getting a wall of text, you get a clean, readable conversation where every part is clearly marked as 'Speaker 1,' 'Speaker 2,' and so on. For anyone analyzing team meetings, customer interviews, or panel discussions, this feature isn't just nice to have—it's a complete game-changer.
Think about sifting through feedback from a recorded focus group. Without speaker labels, you can't easily tell the moderator's questions from a customer's enthusiastic response or another's concern. It becomes a mess, making it incredibly difficult to pull out any real insights. Diarization cuts through that chaos, turning your audio into an organized, searchable log.
The demand for this kind of intelligent transcription is booming. The global market for AI-powered transcription is expected to jump from $4.5 billion in 2024 to an incredible $19.2 billion by 2034, largely because of improvements in contextual understanding like this. If you want to dig into the numbers, you can find more details on the AI transcription market growth here.
The best part? Turning this on with the Lemonfox.ai API is incredibly straightforward. You don't need to jump through hoops; it's just one extra parameter in your request.
Pro Tip: Enabling diarization is as simple as adding
diarize=Trueto your API call. The API does all the heavy lifting of telling voices apart, and the JSON response will neatly include aspeakerlabel for each word.
Let's look at a real-world example to see just how big a difference this makes.
| Standard Transcript (Without Diarization) | Diarized Transcript (With Diarization) |
|---|---|
| "Hi, thanks for joining. I'd like to start with the quarterly numbers. They look strong. What are your thoughts? I agree, revenue is up 15%." | Speaker 1: "Hi, thanks for joining. I'd like to start with the quarterly numbers. They look strong. What are your thoughts?" Speaker 2: "I agree, revenue is up 15%." |
The difference is night and day. The diarized version is instantly clear, making the conversation easy to follow and analyze. This one simple change completely redefines how you can work with your audio data, helping you find deeper insights with almost no extra work on your end.
As you start working with audio transcription, you'll inevitably hit a few roadblocks. It happens to everyone. Developers often bump into the same challenges when they move from clean sample files to the messy reality of real-world audio. This section is here to give you quick, practical answers to the questions we hear most often.
Think of this as your go-to troubleshooting guide for getting the best possible transcription, no matter what kind of audio you throw at it.
The most powerful thing you can do is pre-process your audio. Seriously, this one step makes a world of difference. Before you even think about sending the file to the API, run it through a tool like FFmpeg to apply a simple noise reduction filter. It’s a small effort that can dramatically clean up the signal our AI model has to work with.
Beyond that, stick with a lossless format like FLAC or WAV whenever you can. Also, make sure the audio has a sample rate of at least 16,000 Hz. Our models are tough and can handle less-than-ideal conditions, but feeding them clean, high-quality source material is the surest way to get incredibly accurate text back.
Our API is designed to understand a ton of different languages, but you have to give it a heads-up. The key is to specify the language in your API call using the right language code, like 'en-US' for American English or 'es' for Spanish. This simple parameter tells the model exactly which phonetic and vocabulary rules to use.
When it comes to strong regional accents, our models get a lot of exposure during training from diverse global datasets, which helps a ton. Still, the golden rule applies: clear, high-quality audio is your best friend for getting great results, regardless of the accent.
If you're working with a file that has multiple languages, the best strategy is to split the audio into separate segments for each language. Sending each segment with the correct language parameter will give you far more accurate results than having the model try to figure it out on the fly.
You bet. This is a core feature for anyone who needs more than just a big block of text. When you get the JSON response back from the API, you'll find a words array. Inside that array, every single transcribed word is its own neat little object.
Each word object gives you:
start time in seconds.end time in seconds.This level of detail is a game-changer. You can use it to build interactive transcripts that highlight words as they’re spoken, create perfectly synced video subtitles, or even dive deep into speech pattern analysis.
Ready to start building? Lemonfox.ai gives you a powerful, affordable, and developer-friendly Speech-to-Text API. Sign up now and get your first month free to see just how easy accurate transcription can be.