First month for free!
Get started
Published 11/15/2025
Building your own YouTube transcript AI is all about gaining control. You get to call the shots on everything from accuracy and speed to the final output format, tailoring it perfectly to what you're building. While YouTube's built-in captions are fine for watching a video, they're a closed system. A custom tool, on the other hand, opens up a world of possibilities, like identifying different speakers or exporting data in a way your app can actually use.
Let's be honest: YouTube's automatic transcription is a black box. You get what you get, and that’s it. There’s no way to tweak the model, programmatically fix mistakes, or easily pipe the output into your own software. For developers, this lack of control is a major roadblock. This is exactly why rolling your own solution is so powerful.
When you decide to build a custom YouTube transcript AI, you're no longer just a passive user of a generic feature; you become the architect of a tool designed for a specific purpose. This control is what enables enhancements that standard transcripts just can't deliver.
Before diving into the "how," let's quickly compare the two approaches. It really highlights why putting in the effort to build a custom tool is often the right move for any serious project.
| Feature | YouTube Native Transcription | Custom AI Transcription Solution |
|---|---|---|
| Accuracy & Model Choice | Varies; uses a single, general-purpose model. No control. | You choose the AI model (e.g., general vs. finance-specific) for higher accuracy. |
| Speaker Identification | Not available. Speakers are not separated. | Possible with models that support speaker diarization, labeling "Speaker 1," "Speaker 2," etc. |
| Data Format | Basic plain text or caption formats (SBV, SRT). | Highly flexible. Can output structured JSON, raw text, VTT, SRT, or any custom format. |
| Custom Vocabulary | No support for custom terms, brand names, or jargon. | You can add a custom dictionary to improve recognition of specific words. |
| API Integration | No official API for direct, programmatic access to transcripts. | The entire process is built around an API, enabling seamless integration with your apps. |
| Real-Time Processing | Not available for live streams. | Live transcription is possible with the right API, opening up real-time use cases. |
| Error Correction | Manual correction only through the YouTube Studio interface. | Can be corrected programmatically and integrated into a custom editing workflow. |
As you can see, the difference is night and day. A custom solution is simply in a different league when it comes to flexibility and power.
The biggest win here is choosing your own speech-to-text engine. A service like Lemonfox.ai offers a modern API that goes far beyond just turning audio into words.
Think about what you could do:
This level of control opens the door to so many interesting applications. You could build a tool that automatically creates detailed show notes for a podcast, generates study guides from a lecture, or powers a search feature that lets users jump to the exact moment a topic is mentioned in a huge video archive.
By taking control of the transcription pipeline, developers can transform a simple text output into a rich, queryable dataset that serves as the foundation for countless innovative applications.
It's no surprise that the demand for these kinds of tools is exploding. The global AI transcription market was valued at $1.5 billion in 2024 and is expected to hit over $5.2 billion by 2033, growing at a 15.2% CAGR. This shows a clear trend: businesses across media, education, and tech need more than just basic transcription. You can read more about the transcription market trends to see how this technology is evolving.
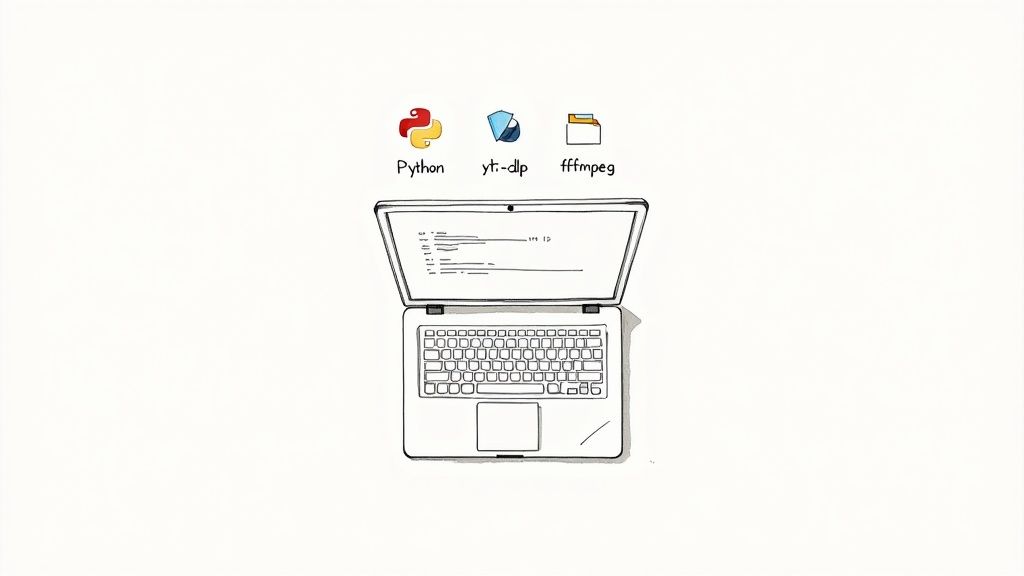
Before we jump into writing any Python to build our YouTube transcript AI, let’s get our workspace set up properly. A clean, organized environment is your best friend—it helps dodge dependency headaches and just makes the whole process go a lot smoother. Think of it like prepping your kitchen before you start cooking; a little organization upfront saves a ton of time and frustration later.
Our setup hinges on three key pieces of software: Python itself for the main script, yt-dlp for grabbing audio streams from YouTube, and ffmpeg to handle the heavy lifting of audio conversion. We’ll get these installed and then create an isolated virtual environment to keep everything tidy.
First thing's first, make sure you have Python installed on your machine. I'd recommend using Python 3.8 or a newer version. Once that's sorted, we need to install the two command-line tools that will do most of the work for us.
For macOS users, the easiest way is with Homebrew. Just pop open your terminal and run:
brew install yt-dlp ffmpeg
If you're on a Debian-based Linux system like Ubuntu, you can use apt:
sudo apt-get update && sudo apt-get install yt-dlp ffmpeg
Windows developers can get these tools using a package manager like Chocolatey, which really simplifies managing command-line software.
I can't stress this enough: using a virtual environment is a must for any serious Python project. It basically creates a self-contained sandbox, so the packages you install for this transcription tool won’t mess with anything else on your system (and vice versa).
Fire up your terminal, cd into your project folder, and run these two commands.
First, create the environment. This makes a new directory called venv that will hold all our project-specific packages.
python3 -m venv venv
Next, you need to activate it. This command tells your shell to use the Python interpreter inside our new venv folder instead of the global one.
source venv/bin/activate
You'll know it worked when you see (venv) prepended to your command prompt. From now on, any package we install with pip will live only inside this project.
The last piece of setup is handling your API key from a provider like Lemonfox.ai. Please, whatever you do, don't hardcode API keys directly in your script. That’s a huge security no-go. The standard, and much safer, way to handle this is with environment variables.
Pro Tip: Never, ever commit your API keys to a Git repository. The very first thing you should do is add your credentials file (like
.env) to your.gitignorefile to avoid leaking it by accident.
In your project's root directory, create a new file named .env. Inside, add your API key like this:
LEMONFOX_API_KEY="your_api_key_here"
To load this into our script, we can use a handy library called python-dotenv. Just install it with pip install python-dotenv. This keeps your sensitive credentials separate from your code, which is exactly what you want for a secure and portable application.
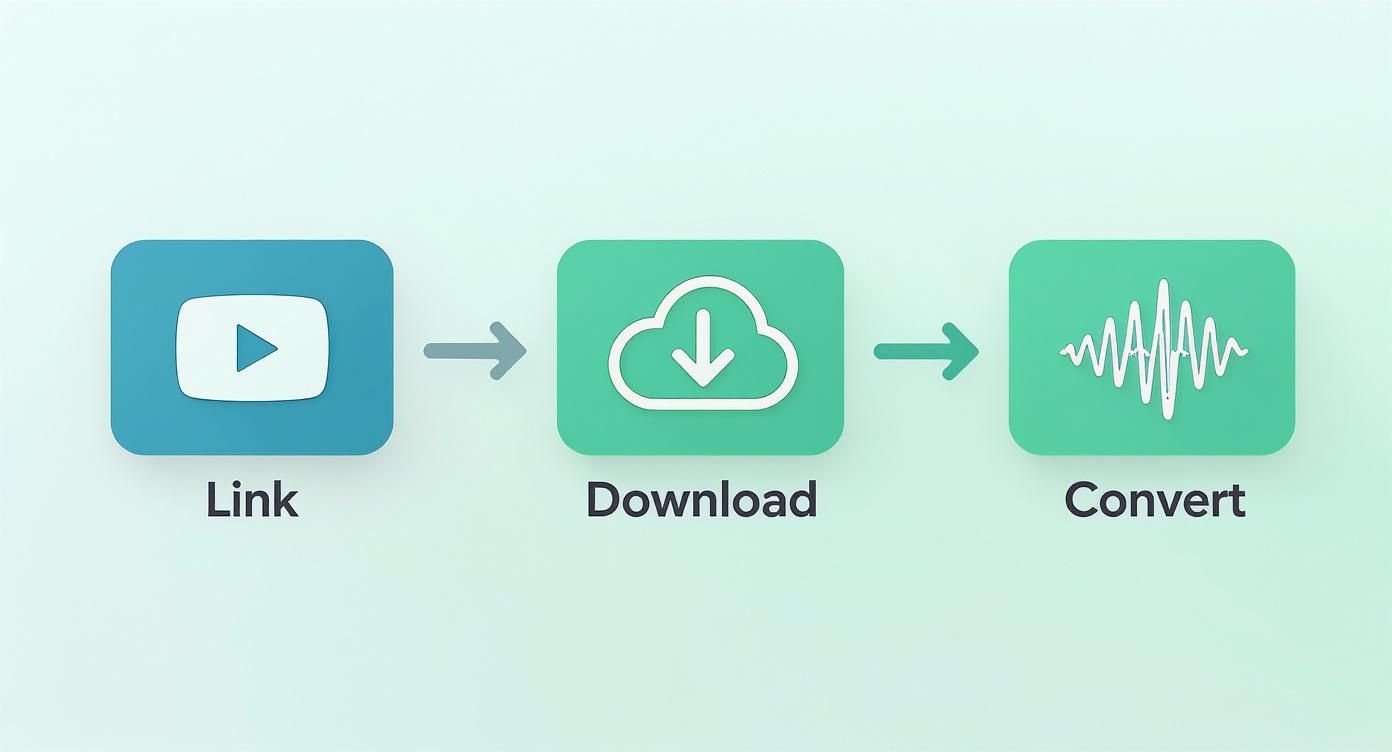
Alright, with our environment ready to go, let's get to the core of it. The whole process kicks off with a single YouTube URL. Our first job is to take that link and turn it into a clean audio file that our speech-to-text API can actually work with.
The magic ingredient here is a fantastic command-line tool called yt-dlp. While it's great for manual downloads, its real power for us is that we can control it directly from our Python code. This means we can tell it to peek into a YouTube video, grab the best audio-only stream it can find, and download it for us. This is way better than pulling down the entire video file—it saves a ton of time and bandwidth.
We'll start by building a Python function that accepts a YouTube URL and a path to save the file. Inside this function, we'll configure a specific set of options for yt-dlp to follow, which is how we guarantee we get the exact audio file we need.
Here are the key settings we'll be using:
format: 'bestaudio/best': This is the most important one. It tells yt-dlp to hunt for the highest quality audio-only stream. If for some reason it can't find one, it'll just grab the best overall stream as a fallback.postprocessors: This is where we tell yt-dlp what to do after the download, like converting the file format.outtmpl: This option lets us specify a consistent and predictable filename for the audio, which makes everything easier to manage later on.By wrapping this logic in a Python function, we turn a messy manual process into a single, clean line of code.
You might be thinking, "Why not just use whatever format YouTube gives me, like M4A or OPUS?" It's a fair question, but the answer comes down to compatibility and, more importantly, accuracy. Most speech-to-text APIs, including the Lemonfox.ai API, are pretty specific about the audio formats they work best with.
If you just throw an unoptimized audio file at the API, you risk getting a flat-out failed request. Even worse, you could get a transcript riddled with errors. To dodge these problems, we’ll convert the audio into a standard, lossless format like FLAC or WAV.
The goal isn't just to get an audio file; it's to get a perfectly prepared audio file. Standardizing the format and channel layout is a small step that pays huge dividends in transcription accuracy and API reliability.
This conversion is handled by ffmpeg, which we already installed. The cool thing is that yt-dlp is smart enough to use ffmpeg automatically as a post-processor. We just tell yt-dlp we want a FLAC file in the options, and it fires up ffmpeg behind the scenes to do the heavy lifting.
For the best results, it's also a good practice to downmix the audio to a single channel (mono). A lot of STT models are trained on mono audio, and feeding them a stereo file can sometimes introduce weird artifacts or noise. We can easily add an ffmpeg argument in our script to handle this, making sure the audio is perfectly prepped for the AI.
Once that's done, we have a clean, standardized audio file ready for the next stage: transcription.
Alright, you've got a clean, well-formatted audio file ready to go. Now for the fun part: sending it off to an AI to do the heavy lifting. We'll be using the Lemonfox.ai speech-to-text API for this. Think of it like packaging up your audio, giving the API a specific set of instructions, and getting back a structured text file.
Making the API request isn't just about tossing the file over the fence. You have to authenticate yourself and tell the AI precisely what you need. This is all handled through the request's headers and parameters.
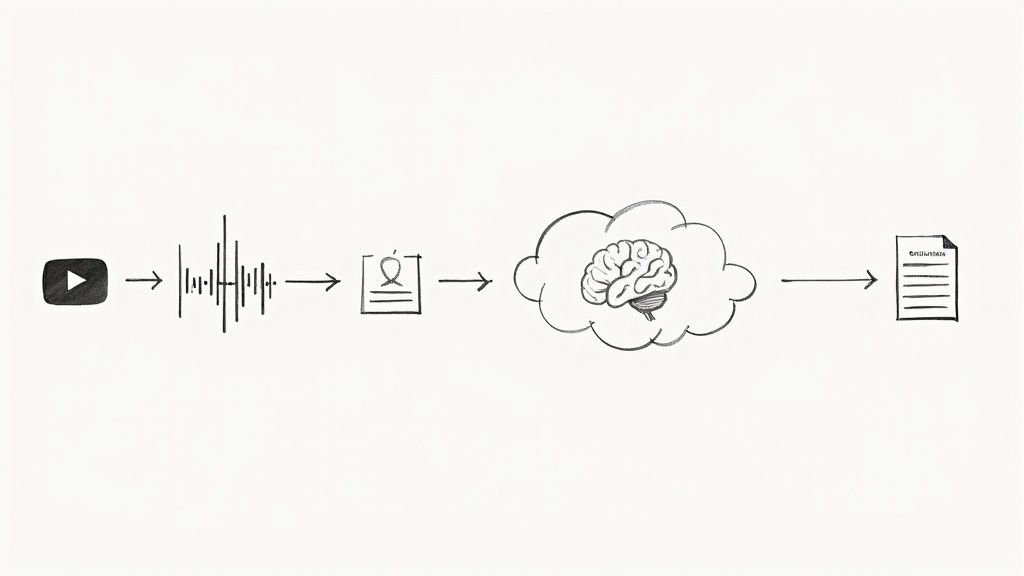
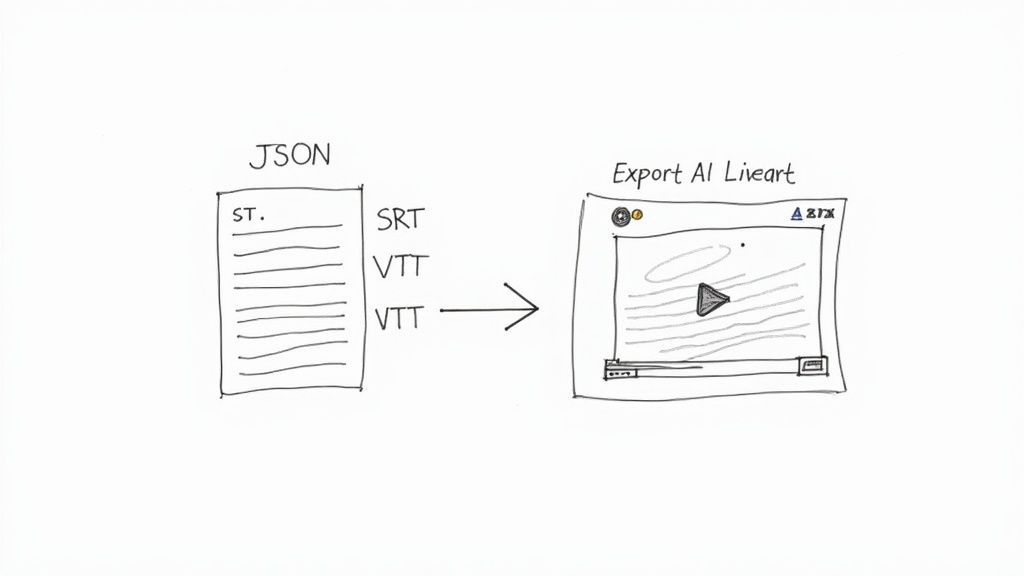
This infographic gives you a quick visual on how a simple YouTube link becomes a transcription-ready audio file.
As you can see, a couple of key conversions are necessary to get the audio into an ideal format that the API can work with efficiently.
At its core, transcribing audio is a POST request to the API's endpoint. Your request needs to bundle up a few key things:
multipart/form-data payload.A quick but important note for developers handling data from folks in the European Union: always use the correct regional API endpoint. Lemonfox.ai offers a dedicated EU endpoint, which is crucial for keeping data processing within the EU and staying on the right side of GDPR.
Modern APIs that create a youtube transcript ai can do a lot more than just turn speech into text. Two features, in particular, are incredibly useful for video content: specifying the language and identifying different speakers (diarization).
Setting the language might seem obvious, but it's a huge accuracy booster. While some models try to auto-detect the language, explicitly telling it what to expect (like language: 'en') makes a massive difference, especially with regional accents or niche terminology.
Speaker diarization is the real game-changer. By simply adding diarization: true to your request, the API won't just give you a block of text. It will actually identify who is speaking and when. The output will be neatly segmented with labels like "Speaker 1" and "Speaker 2." For interviews or panel discussions, this is indispensable.
Key Takeaway: Speaker diarization transforms a flat wall of text into a structured, easy-to-read dialogue. It's the one feature that can take your transcript from a simple text dump to a professional, analysis-ready document.
The quality of these tools has skyrocketed recently. Top-tier AI services now hit accuracy rates of up to 98% in good conditions. Compare that to the 66% average for YouTube's own auto-captions, and you can see why this is a big deal. For creators, this leap means slashing editing time by 60-70%. If you're curious about the data behind this, you can read the full analysis on AI transcription accuracy for a deeper dive.
Let's tie this all together with some code. The Python script below uses the popular requests library to upload an audio file to the Lemonfox.ai API. I've included the parameters for both language selection and speaker diarization.
import requests
import os
from dotenv import load_dotenv
load_dotenv()
LEMONFOX_API_KEY = os.getenv("LEMONFOX_API_KEY")
def transcribe_audio(file_path):
"""
Uploads an audio file to the Lemonfox.ai API and gets the transcript.
"""
url = "https://api.lemonfox.ai/v1/audio/transcriptions/"
headers = {
"Authorization": f"Bearer {LEMONFOX_API_KEY}"
}
with open(file_path, 'rb') as audio_file:
    files = {
        'file': (os.path.basename(file_path), audio_file)
    }
    data = {
        'language': 'en',
        'diarization': 'true' # Request speaker labels
    }

    response = requests.post(url, headers=headers, files=files, data=data)

if response.status_code == 200:
    return response.json()
else:
    print(f"Error: {response.status_code}")
    print(response.text)
    return None
transcript_data = transcribe_audio("path/to/your/audio.flac")
if transcript_data:
# Print the full transcribed text
print(transcript_data['text'])
# Print each word with its speaker and timestamp
for word in transcript_data.get('words', []):
    print(f"[{word['start']:.2f}s - {word['end']:.2f}s] Speaker {word['speaker']}: {word['word']}")
This code snippet takes care of the authentication, file upload, and parameters. If the request is successful, it will print the full transcript first. Then, it loops through every single word in the response, showing you its precise start and end time, along with the speaker label. This gives you incredibly granular data to work with for what comes next.
Getting that structured JSON object back from the API is a great first step, but let's be honest, in its raw form, it's not very useful. The real magic happens when you transform that data into something your applications—and your users—can actually work with. This is where we close the loop and turn raw data into real-world value.
The most obvious win is creating professional-grade subtitles. The timestamped data you get back is the perfect raw material for generating standard caption files like SubRip Text (.srt) and WebVTT (.vtt). These are the bread and butter of web video, supported by practically every player out there, making your content immediately more accessible.
Both SRT and VTT are simple, text-based formats, which means they're a breeze to generate programmatically. Each caption entry, often called a "cue," has a sequence number, a start and end timestamp, and the actual text. The main thing to watch out for is the timestamp format; SRT uses a comma for the millisecond separator, while VTT uses a period.
Here’s a quick breakdown of how they stack up:
| Feature | SRT Format (.srt) |
VTT Format (.vtt) |
|---|---|---|
| Header | None required | Must start with a WEBVTT line |
| Timestamp Separator | 00:00:01,234 (comma) |
00:00:01.234 (period) |
| Styling Support | Nope, just plain text | Supports basic text formatting (bold, italic) |
| Metadata | Not supported | You can add comments and other metadata |
To spin up these files in Python, you'll just need to iterate through the words array from the API response. I usually group words into logical sentences or fixed time chunks—say, every 5 seconds—to create captions that feel natural and aren't just a wall of text.
A great transcript isn't just about accuracy; it's about utility. By converting raw API data into standard formats like SRT or VTT, you unlock its potential for improving accessibility, SEO, and user engagement across any platform.
Captions are essential, but sometimes your users just need a clean, readable document. With the raw API output and its speaker labels, you can easily generate a formatted script that's perfect for a blog post, show notes, or a full article. Repurposing your video content this way is a seriously underrated SEO strategy.
All it takes is a simple function that loops through the transcript data and builds a string. When you notice the speaker ID changes from one word to the next, just pop in a new line with the new speaker's label (e.g., "Speaker 2:").
This gives you a clean, conversational document that's easy to skim and great for repurposing. Turning your video into a blog post gets all that valuable information indexed by search engines, helping you reach people who'd rather read than watch.
Finally, don't overlook the goldmine you have in that structured JSON output. This isn't just for creating text files; you can parse this data to get some really deep insights into your content.
For instance, you could build tools that:
When you start thinking beyond simple text output, your youtube transcript ai becomes the foundation for some seriously sophisticated content intelligence tools.
As you start piecing together your own YouTube transcript AI, you'll inevitably run into a few common roadblocks and questions. Thinking through these ahead of time will save you a lot of refactoring later and help you build a much more solid tool.
Let's talk about the big one first: cost. Your main expense will be the speech-to-text API itself, which usually bills by the minute of audio you process. You might also have some minor server costs if you're deploying this as a web app, plus a little for storing the audio files. A smart move is to start with an API provider's free tier. This lets you build and test everything without spending a dime.
So, what happens when you need to transcribe a 3-hour podcast or a full-day conference talk? For anything over an hour, you'll want to break the audio into smaller chunks. I've found that 15-20 minute segments work best. Sending these smaller pieces to the API is not only faster but also way more reliable.
Live streams are a different beast entirely. You can't just use yt-dlp for a continuous stream. This requires a much more sophisticated setup to capture and process audio in real-time as it's broadcast.
From my experience, the most frequent errors you'll hit are bad YouTube URLs, videos blocked in your region,
ffmpegconversion hiccups, or the API kicking back your request because of an invalid key or a file that's too large. Good, solidtry-exceptblocks are your best friend here for catching and logging what went wrong.
Can this handle languages other than English? Of course. Most modern speech-to-text APIs are multilingual, supporting dozens of languages. All you need to do is tell the API which language to expect by including the right language code in your request.
While some APIs have an "auto-detect" feature, I'd recommend specifying the language yourself. You'll get much better accuracy, especially if the video has speakers with heavy accents or switches between languages.
Ready to start building with a fast, affordable, and powerful API? Lemonfox.ai gives you a 30-hour free trial that includes speaker diarization and support for over 100 languages. You can get started for free and grab your API key.